Install using the Add-On
With the Tetrate AWS EKS Add-On, you can install Istio easily on an EKS cluster.
Installation Options
You can install the Add-On using either the AWS CLI or the AWS Web Console.
- AWS CLI
- AWS Web Console
Install the Add-On via the command line
Check the add-on is available
Check that add-on is available by issuing the commands below. Please set these variables:
TIS_VERSIONis the Tetrate Istio Subscription versionKUBERNETES_VERSIONis the Kubernetes version you use in your cluster. This must be the same with the Kubernetes version you created in previous step.CLUSTER_NAMEis your cluster nameREGIONis the AWS region name.
The version numbers are in
major.minorformat.Note that an AWS Marketplace subscription is required before for TID addon to be deployed in AWS account.
export TIS_VERSION=1.22
export KUBERNETES_VERSION=1.30
export CLUSTER_NAME=MyCluster
export REGION=us-east-1

export ADDON_VERSION=$(aws eks describe-addon-versions --addon-name tetrate-io_istio-distro --kubernetes-version $KUBERNETES_VERSION  | jq -r ".addons[0].addonVersions[]|select(.addonVersion|strings|startswith(\"v$TIS_VERSION\"))|.addonVersion")
echo $ADDON_VERSION
The
ADDON_VERSIONmust contains value such asv1.22.30001-eksbuild.1or similar. If this variable is empty, then the addon is not available in the specified TIS and Kubernetes versions.Deploy the Add-On
Deploy the add-on to your cluster in AWS EKS:
eksctl create addon --name tetrate-io_istio-distro \
    --cluster $CLUSTER_NAME \
    --version $ADDON_VERSION \
    --region $REGION \
    --wait
The installation will take around 2 minutes. To get the current state use the following command.
aws eks describe-addon --addon-name tetrate-io_istio-distro --cluster-name <CLUSTER_NAME>
When the add-on is in Active state, you can proceed with deploying applications in Istio-enabled EKS cluster.
Install the Add-On via AWS Web Console
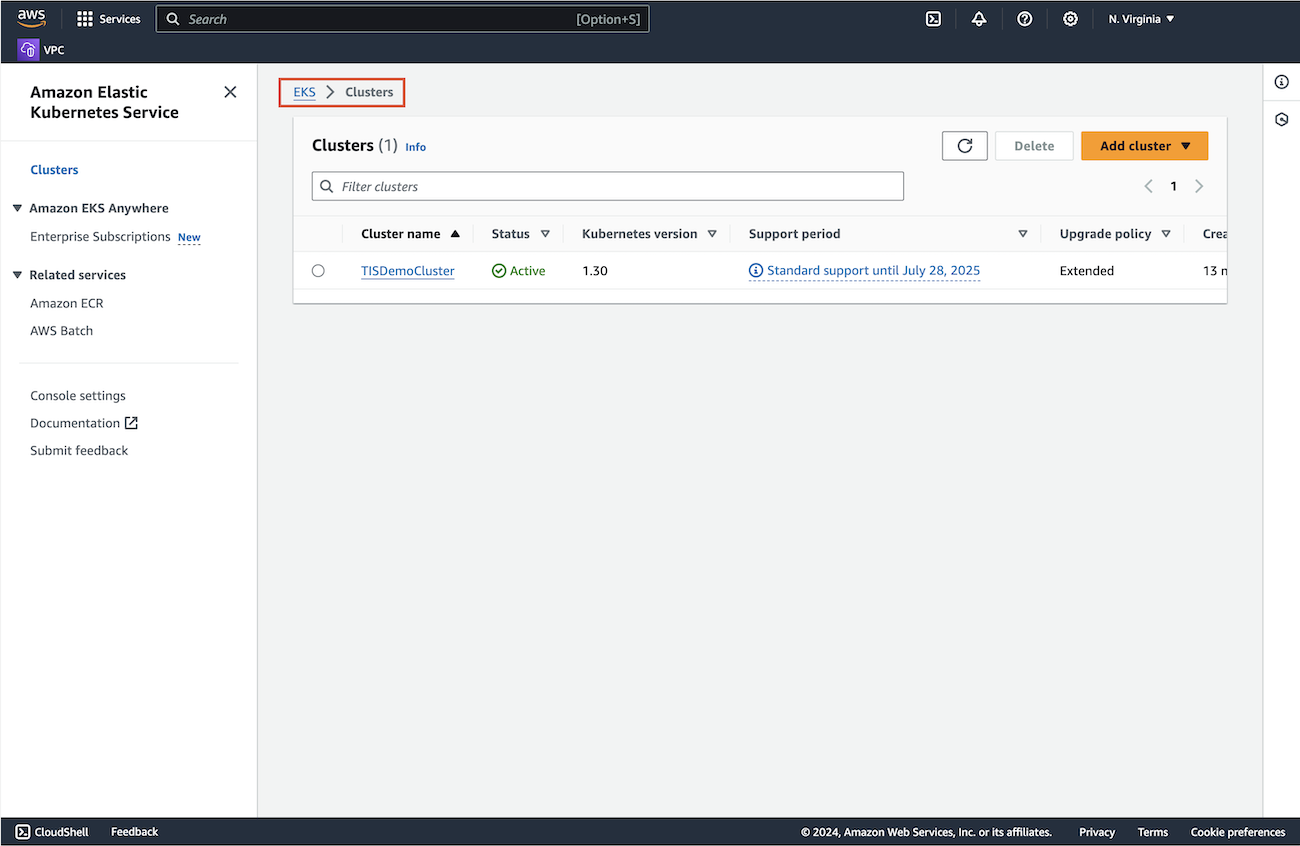
Find your Cluster
Proceed to EKS section of AWS Web Console and locate your cluster:
Get the Add-On
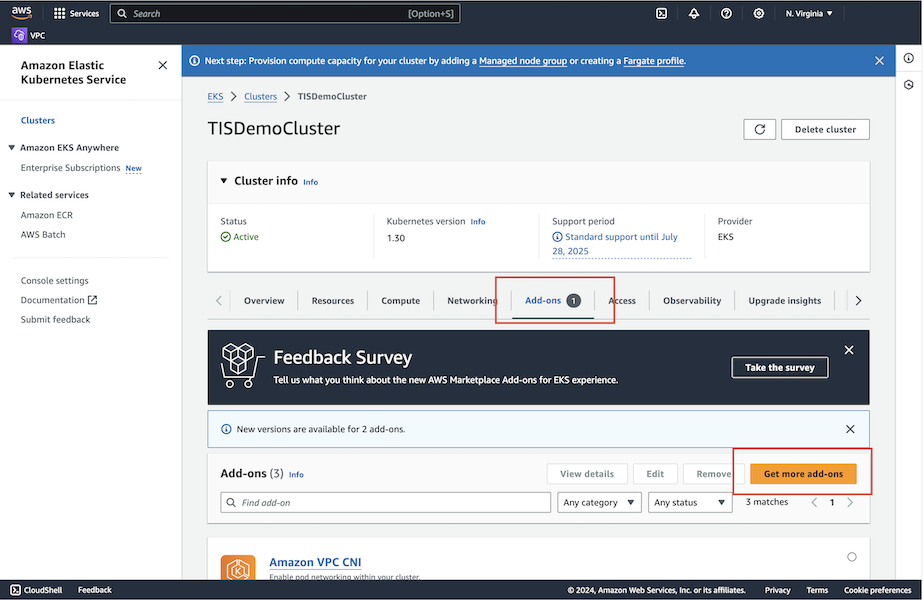
Select Add-ons tab and select Get more add-ons
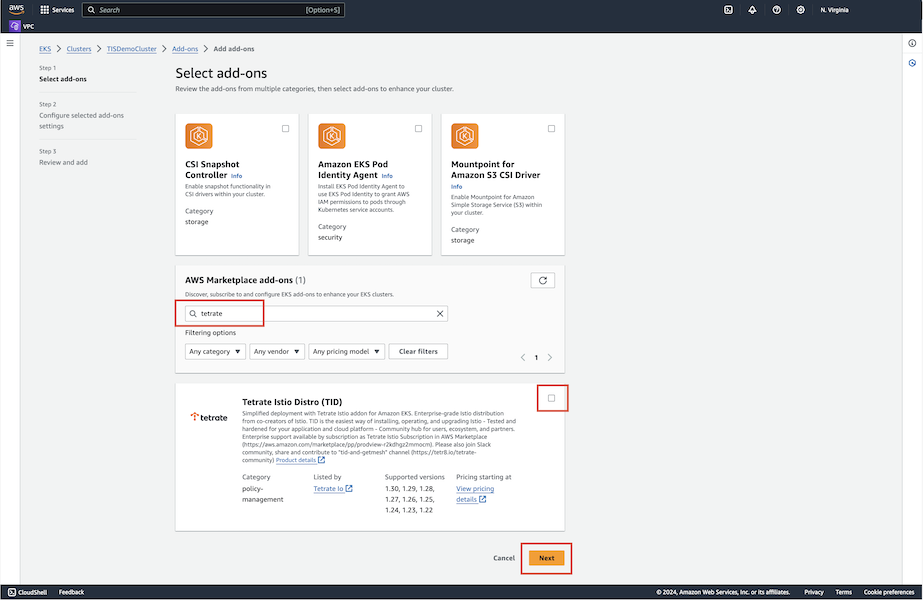
Scroll down to AWS Marketplace add-ons section of add-ons:
- type
Tetratein the search bar - select checkmark in the right top corner and click Next
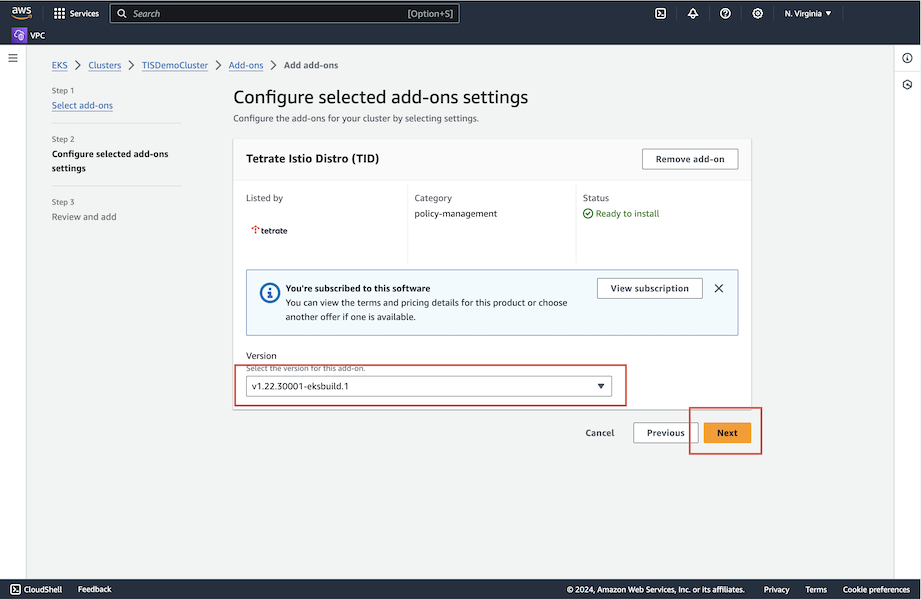
On the next screen confirm the TID version and click Next:
Finally, the Review and add screen confirms that the selection is correct:
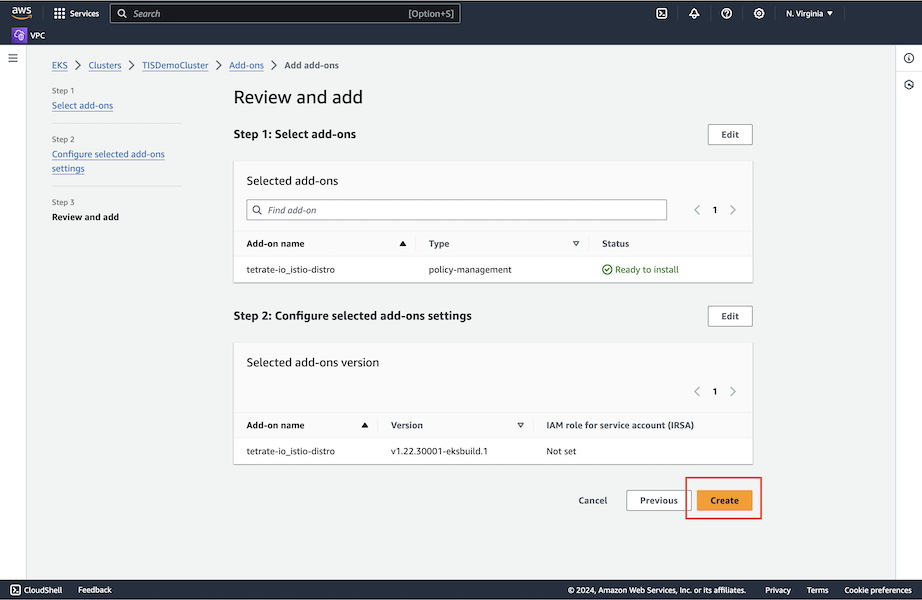
- type
Wait for the Add-On to be deployed
You're taken back to the cluster add-on tab and can see that the add-on is being created:
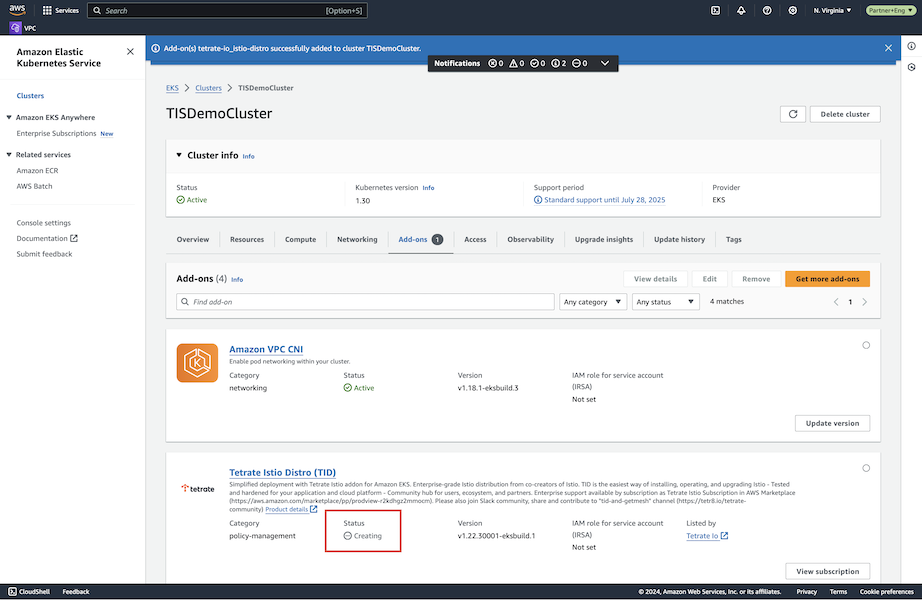
After waiting for 90 seconds, refreshing the UI if necessary, you can see that the add-on is deployed successfully:
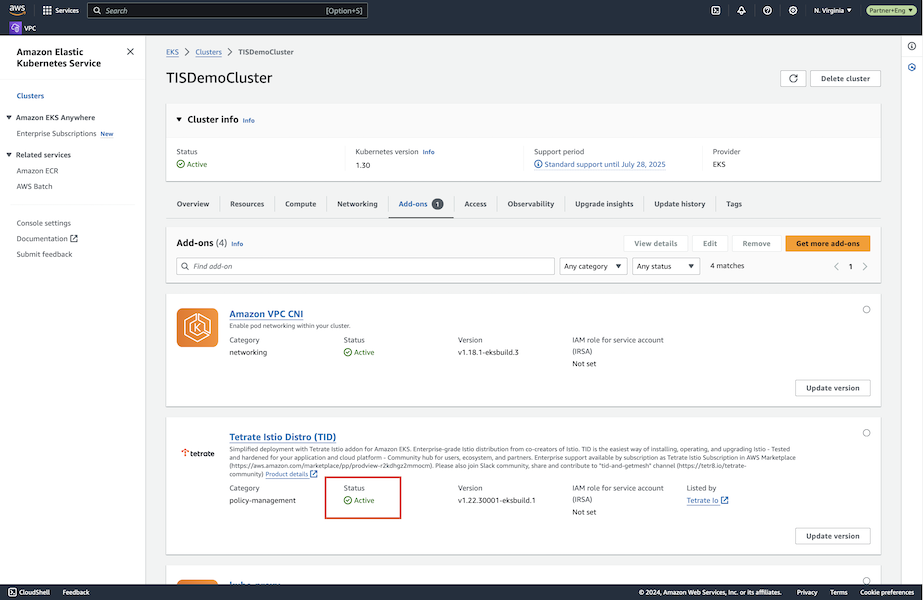
When the add-on is in Active state, you can proceed with deploying applications in Istio-enabled EKS cluster.
You'll also need to configure and deploy an Istio Gateway in the next step.