 Tetrate Patch ServiceVersion: alpha
Monitoring Vulnerabilities
The CVEs view in Tetrate Patch Service shows the exposure of the Tetrate images running in your clusters right now, not a generic advisory feed: every number on the page is backed by a scan of an image your fleet actually runs. This page shows how to read the summary cards, scope the view to one cluster, trace exposure back to the images that carry it, and tell fresh scan data from stale. For how scanning and categories work, see CVE Scanning and Findings.
Understanding the CVEs View
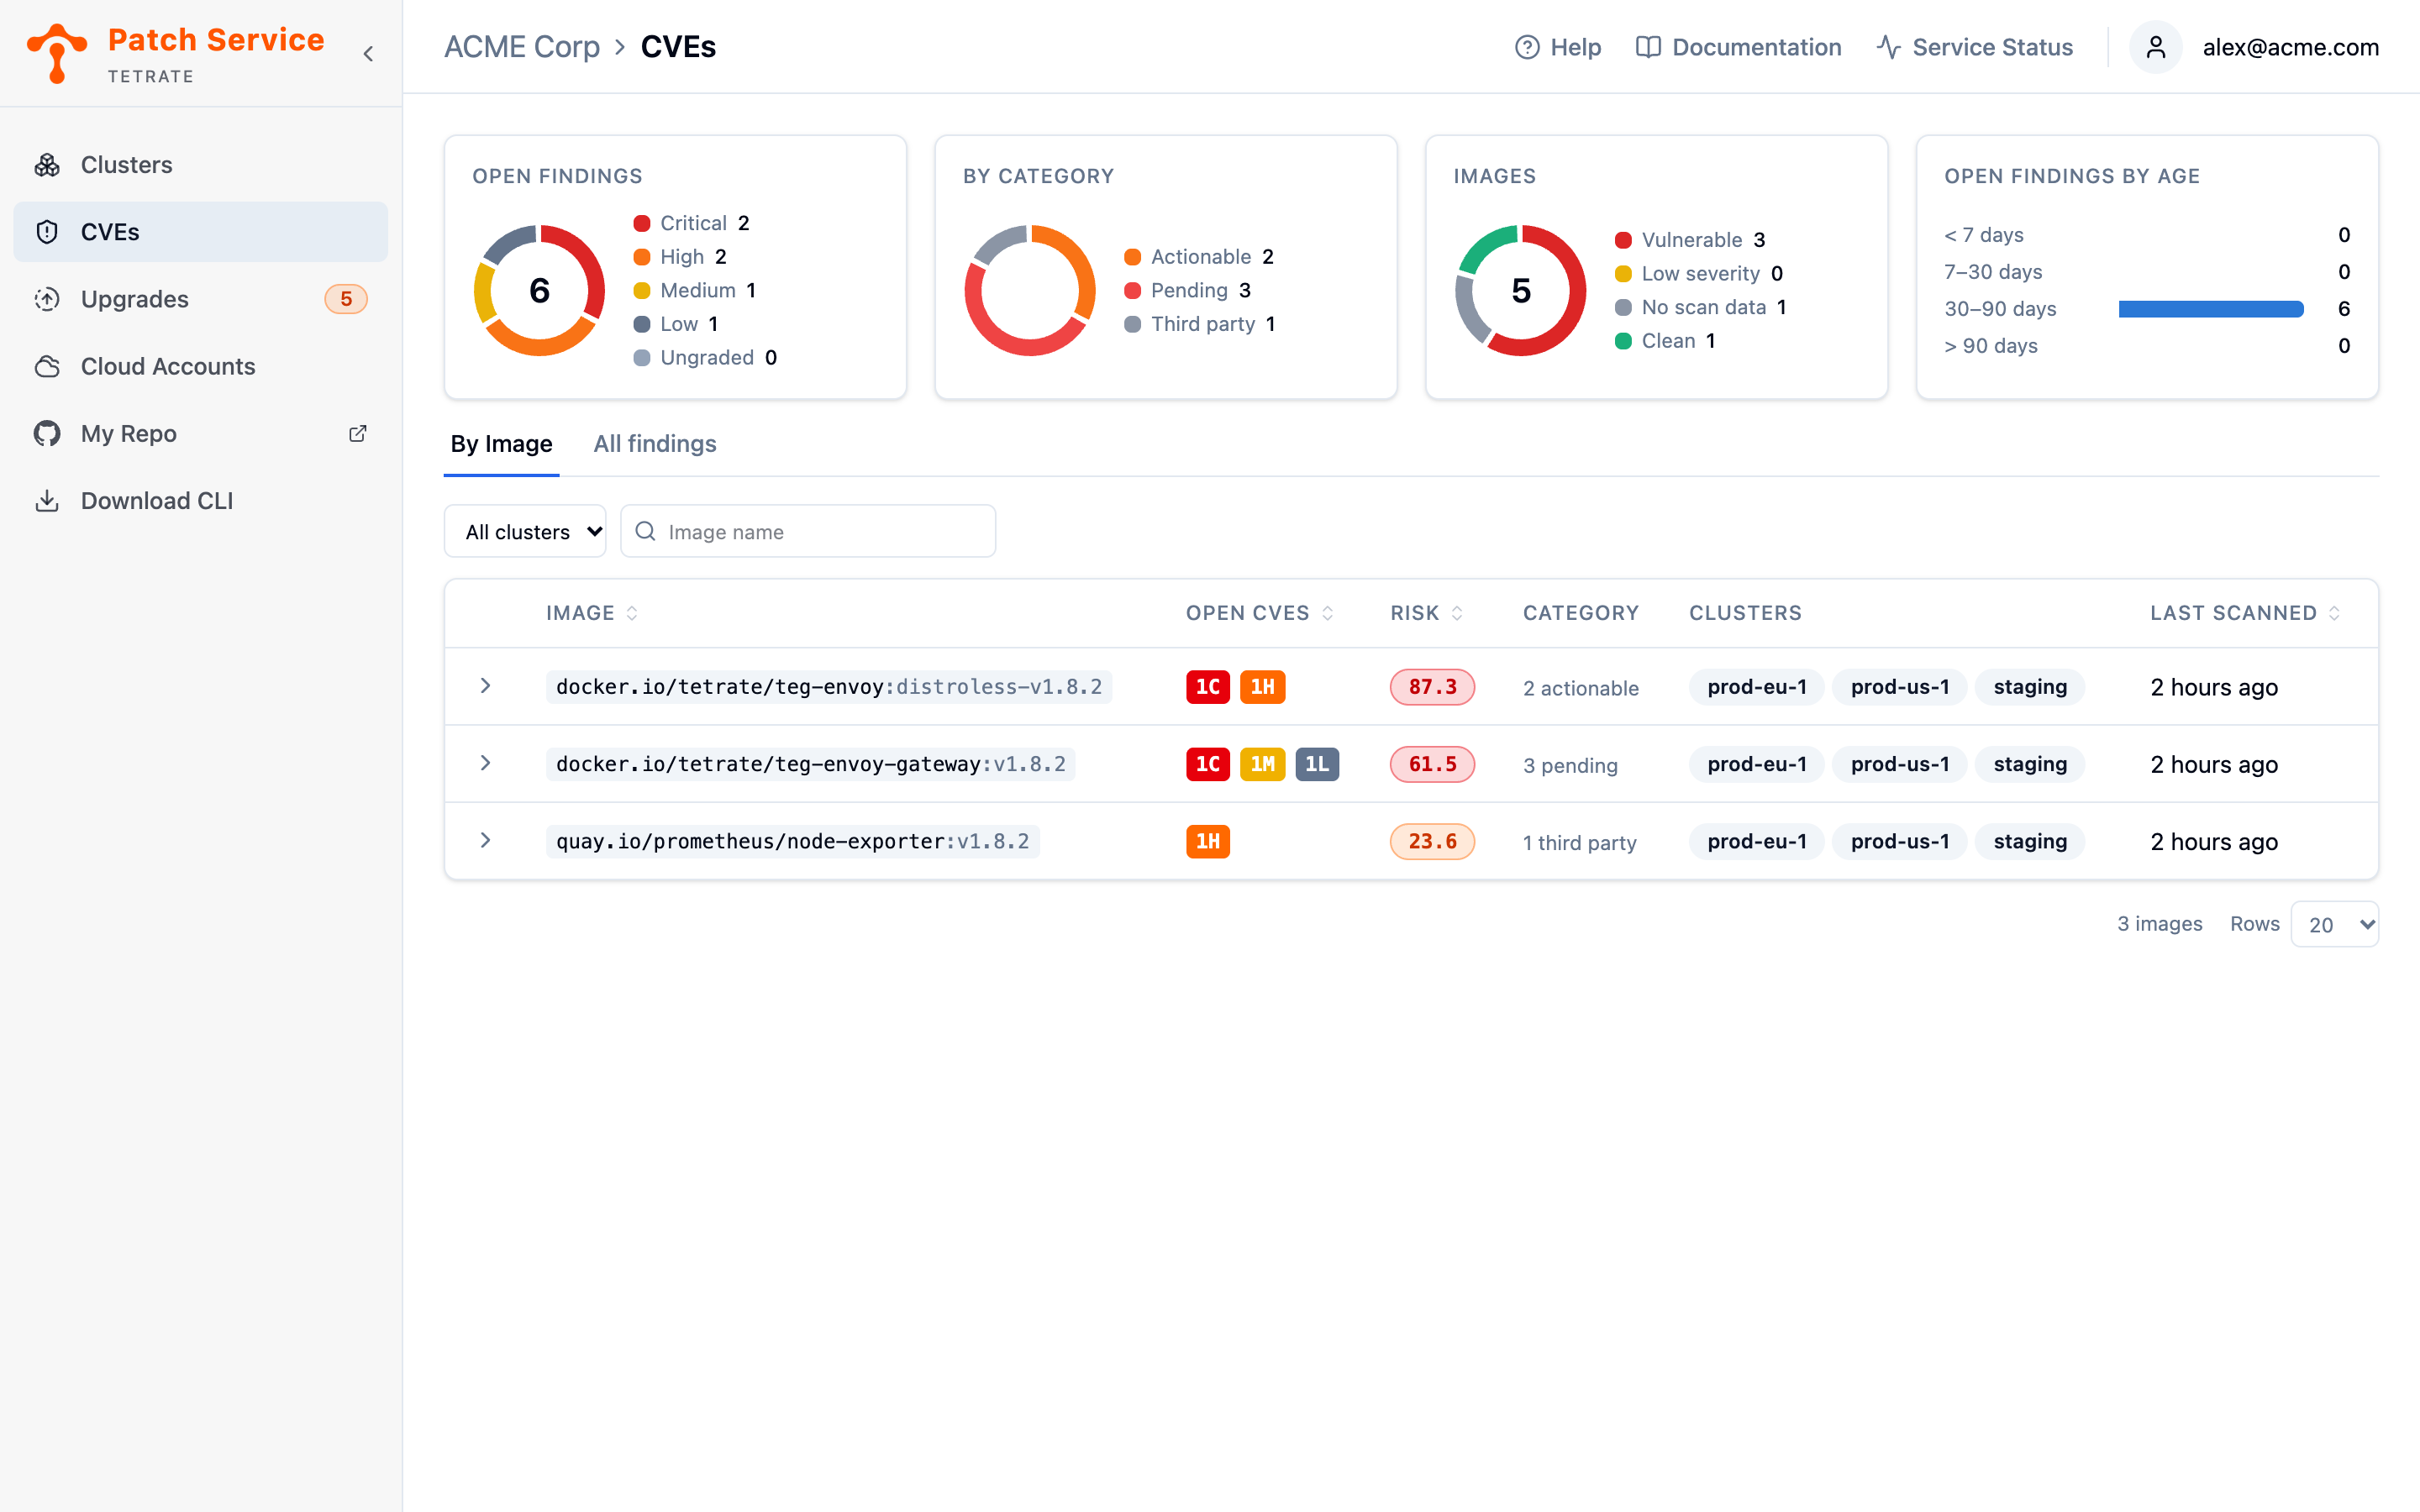
Open CVEs in the sidebar. Four summary cards across the top answer the fleet-wide questions before you read a single row:
| Card | What it tells you |
|---|---|
| Open findings | Every open finding in your fleet, as a ring split by severity, Critical, High, Medium, Low, and Ungraded, with the open total in the center. |
| By category | The same findings split by category: actionable (an upgrade fixes it now), pending (the fix arrives in Tetrate's next release), and third party (not a Tetrate image, informational). |
| Images | Every distinct image observed in your fleet, with the total in the center: Vulnerable (at least one open Critical or High finding), Low severity (open findings, but none above Medium), Clean (scanned, nothing found), or No scan data (never scanned). An image with only Medium or Low findings is never counted as clean. |
| Open findings by age | Open findings bucketed by how long they have been open, counted from First detected. Weight in the older buckets is a backlog: findings nobody has closed, whatever their severity says. |
Below the cards, two tabs hold the detail. By Image rolls findings up per image and is covered below; All findings lists every finding individually, with filters for severity, risk, category, and status, and is covered in Investigating Findings. Each tab carries its own filter row, and the cluster selector is the first control in it.
The view is read-only by design: there is no dismiss or accept-risk action, so a falling Open findings count always means scans observed fixed images, never that someone hid a finding.
Filtering by Cluster
The cluster selector, at the start of the filter row above either tab's table, scopes the summary cards and both tabs to one cluster; All clusters is the default and shows the whole fleet. Scope to a cluster to see what that cluster is exposed to; return to All clusters to rank what to fix first.
Findings belong to images, not clusters, so scoping changes attribution rather than the findings themselves: a finding on an image running in three clusters appears in each of those three scoped views, and it resolves in all of them at once when a scan of the fixed image confirms the CVE is gone.
Reviewing Exposure by Image
The By Image tab shows one expandable row per vulnerable image, so you can see which images carry your exposure and where they run.
- Open the By Image tab. Each row is one image summary: the repository and tag under Image, open finding counts per severity as chips under Open CVEs, the highest risk score among the image's open findings under Risk, the split across actionable, pending, and third party under Category, every cluster running the image under Clusters, and when the image was last scanned under Last scanned. Only images with open findings are listed; clean and never-scanned images are counted in the Images card instead.
- Search by image name in the box beside the cluster selector to narrow the list, for example
envoyfor every Envoy image. The box matches any part of the name and searches every vulnerable image, not only the rows on screen; to narrow by cluster, use the selector instead. - Sort by Open CVEs to bring the images with the most severe findings to the top, or by Risk to bring the images carrying the vulnerability most likely to be exploited to the top. The first click on Risk sorts highest first, and images with no scored finding always sort last. Image and Last scanned sort as well.
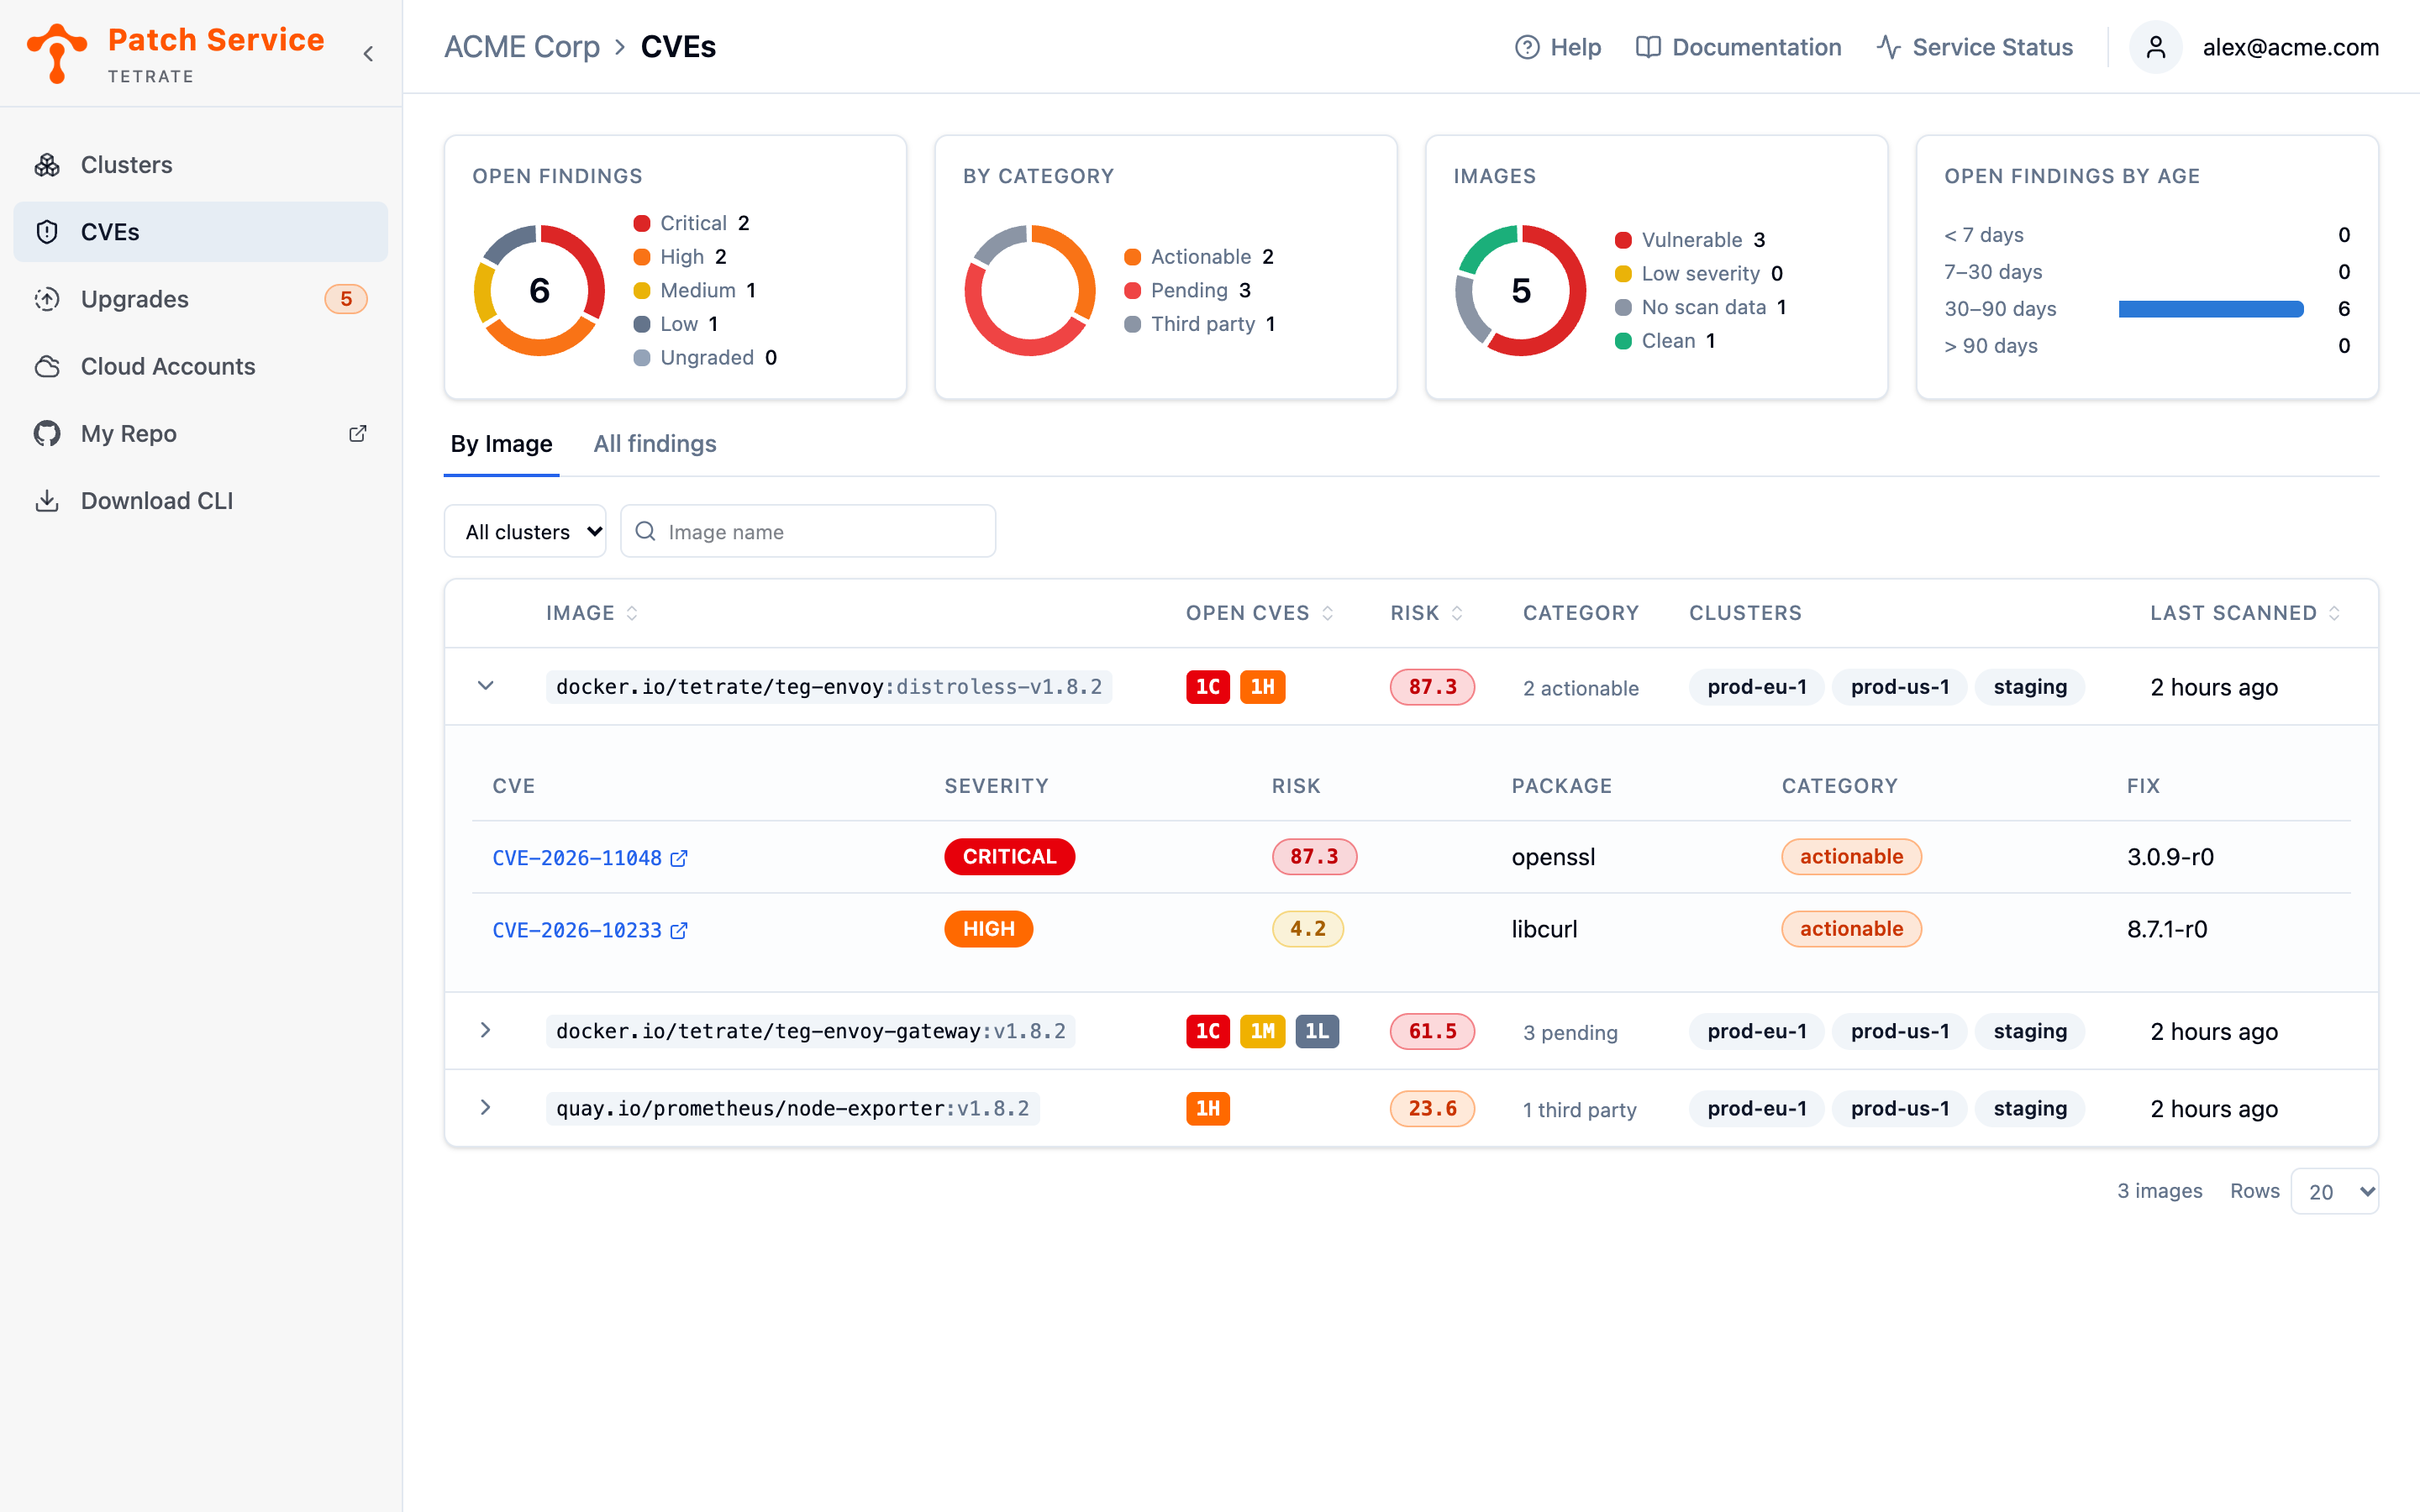
- Expand a row to see that image's open findings: CVE (the ID links to its NVD entry), Severity, Risk, Package (the vulnerable package inside the image), Category, and Fix (the version that resolves the CVE).
- Check any row carrying a warning marker beside the image name. It flags a repository running different tags across the fleet, usually an upgrade that never finished. Each tag is its own row, so compare the flagged rows' Clusters columns to see which clusters lag behind.
The two columns answer different questions, so read them together. In the example below, the teg-envoy-gateway row carries a Critical finding, but its Risk of 61.5 comes from a Medium one: the Critical finding has no score yet, and the Medium one is likely to be exploited. An image's Risk dash means none of its open findings is scored, which says the risk is unmeasured, not that the image is safe.
Understanding Scan Freshness
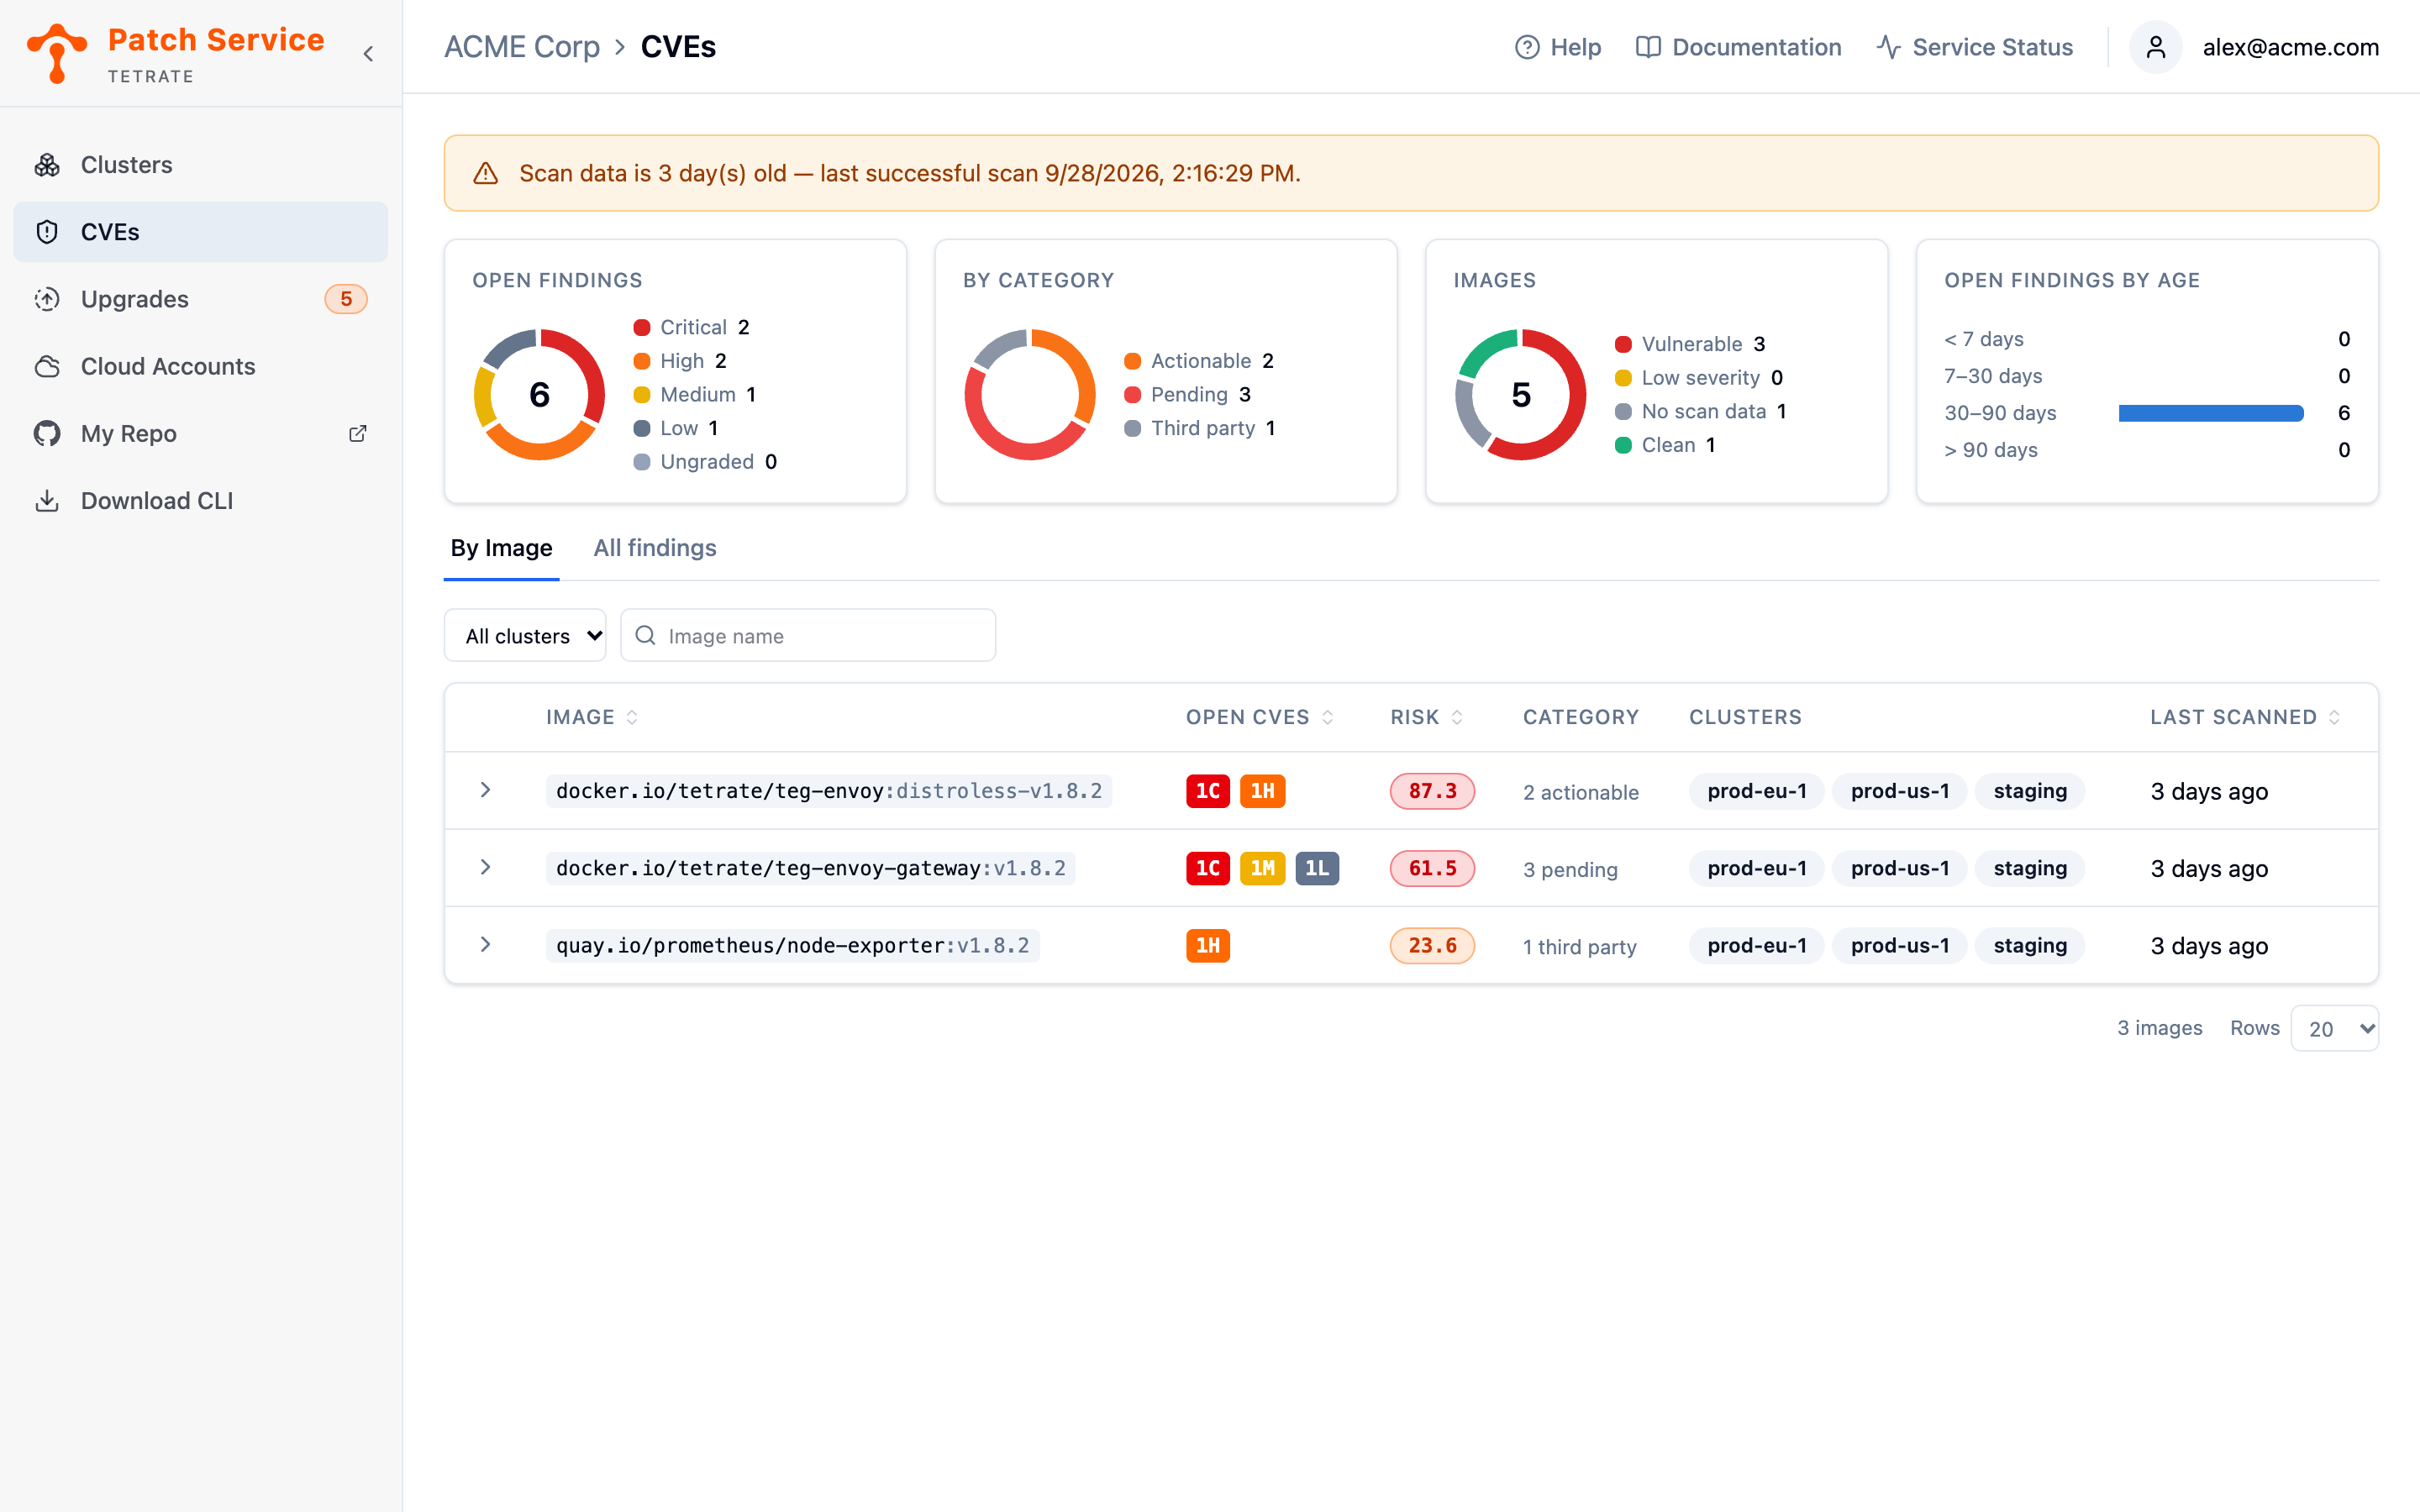
Findings move only on scan evidence, so the view reports scan freshness alongside the results themselves. A warning banner appears above the summary cards when the newest scan is more than 48 hours old, stating how old the scan data is and when the last successful scan completed.
A distinct message appears when no scan has ever completed: nothing on the page is evidence yet, so treat every image as unchecked.
An image that has never been scanned counts as No scan data in the Images card, never as clean: zero findings without a scan means unchecked, not safe. The Patch Service fails visibly by design, so a quiet view is one backed by a recent scan, never one hiding an outage.
There is no customer-side scan to trigger: scanning is Tetrate-operated. Every observed image is scanned nightly and a never-before-seen image is scanned as soon as it is observed, so No scan data resolves on its own; a banner that persists means scanning is delayed, not that your fleet is clean.
Next Steps
- Investigate individual findings when you need everything about one CVE: the images and clusters it touches, when it was first detected, and its fix.
- Remediate vulnerabilities when actionable findings name an upgrade target for your clusters.
- Read CVE Scanning and Findings when you want the model behind scanning, categories, and how findings are prioritized.