 Tetrate Patch ServiceVersion: alpha
Connecting Your Repository
If you already deploy Tetrate products from a GitOps repository, you can keep it. Connect it from the console, and Tetrate Patch Service proposes every new Tetrate release there as a pull request. You review and merge it under your repository's own rules, and your Argo CD, Flux or Terraform rolls it out. Managed Upgrades explains the model.
Setting it up takes a few minutes. The console generates every file for your account; you commit them, and add a few lines to the files that already deploy each product.
Before You Begin
You need:
- The repository on GitHub.com that your clusters are deployed from.
- Permission to install a GitHub App on it, and to change its Actions settings.
- Argo CD, Flux, or a Terraform pipeline that deploys from it.
- The agent on each cluster: connect your clusters first if you have not. You will move the agent into the repository as part of this setup, so it is upgraded the same way.
Patch Service never writes to your repository. It reads it through a read-only GitHub App, and the pull requests are opened by a workflow that runs in your repository.
Step 1: Open the Setup Guide
Click Upgrades in the sidebar. Until a repository is connected, the page offers to connect one:
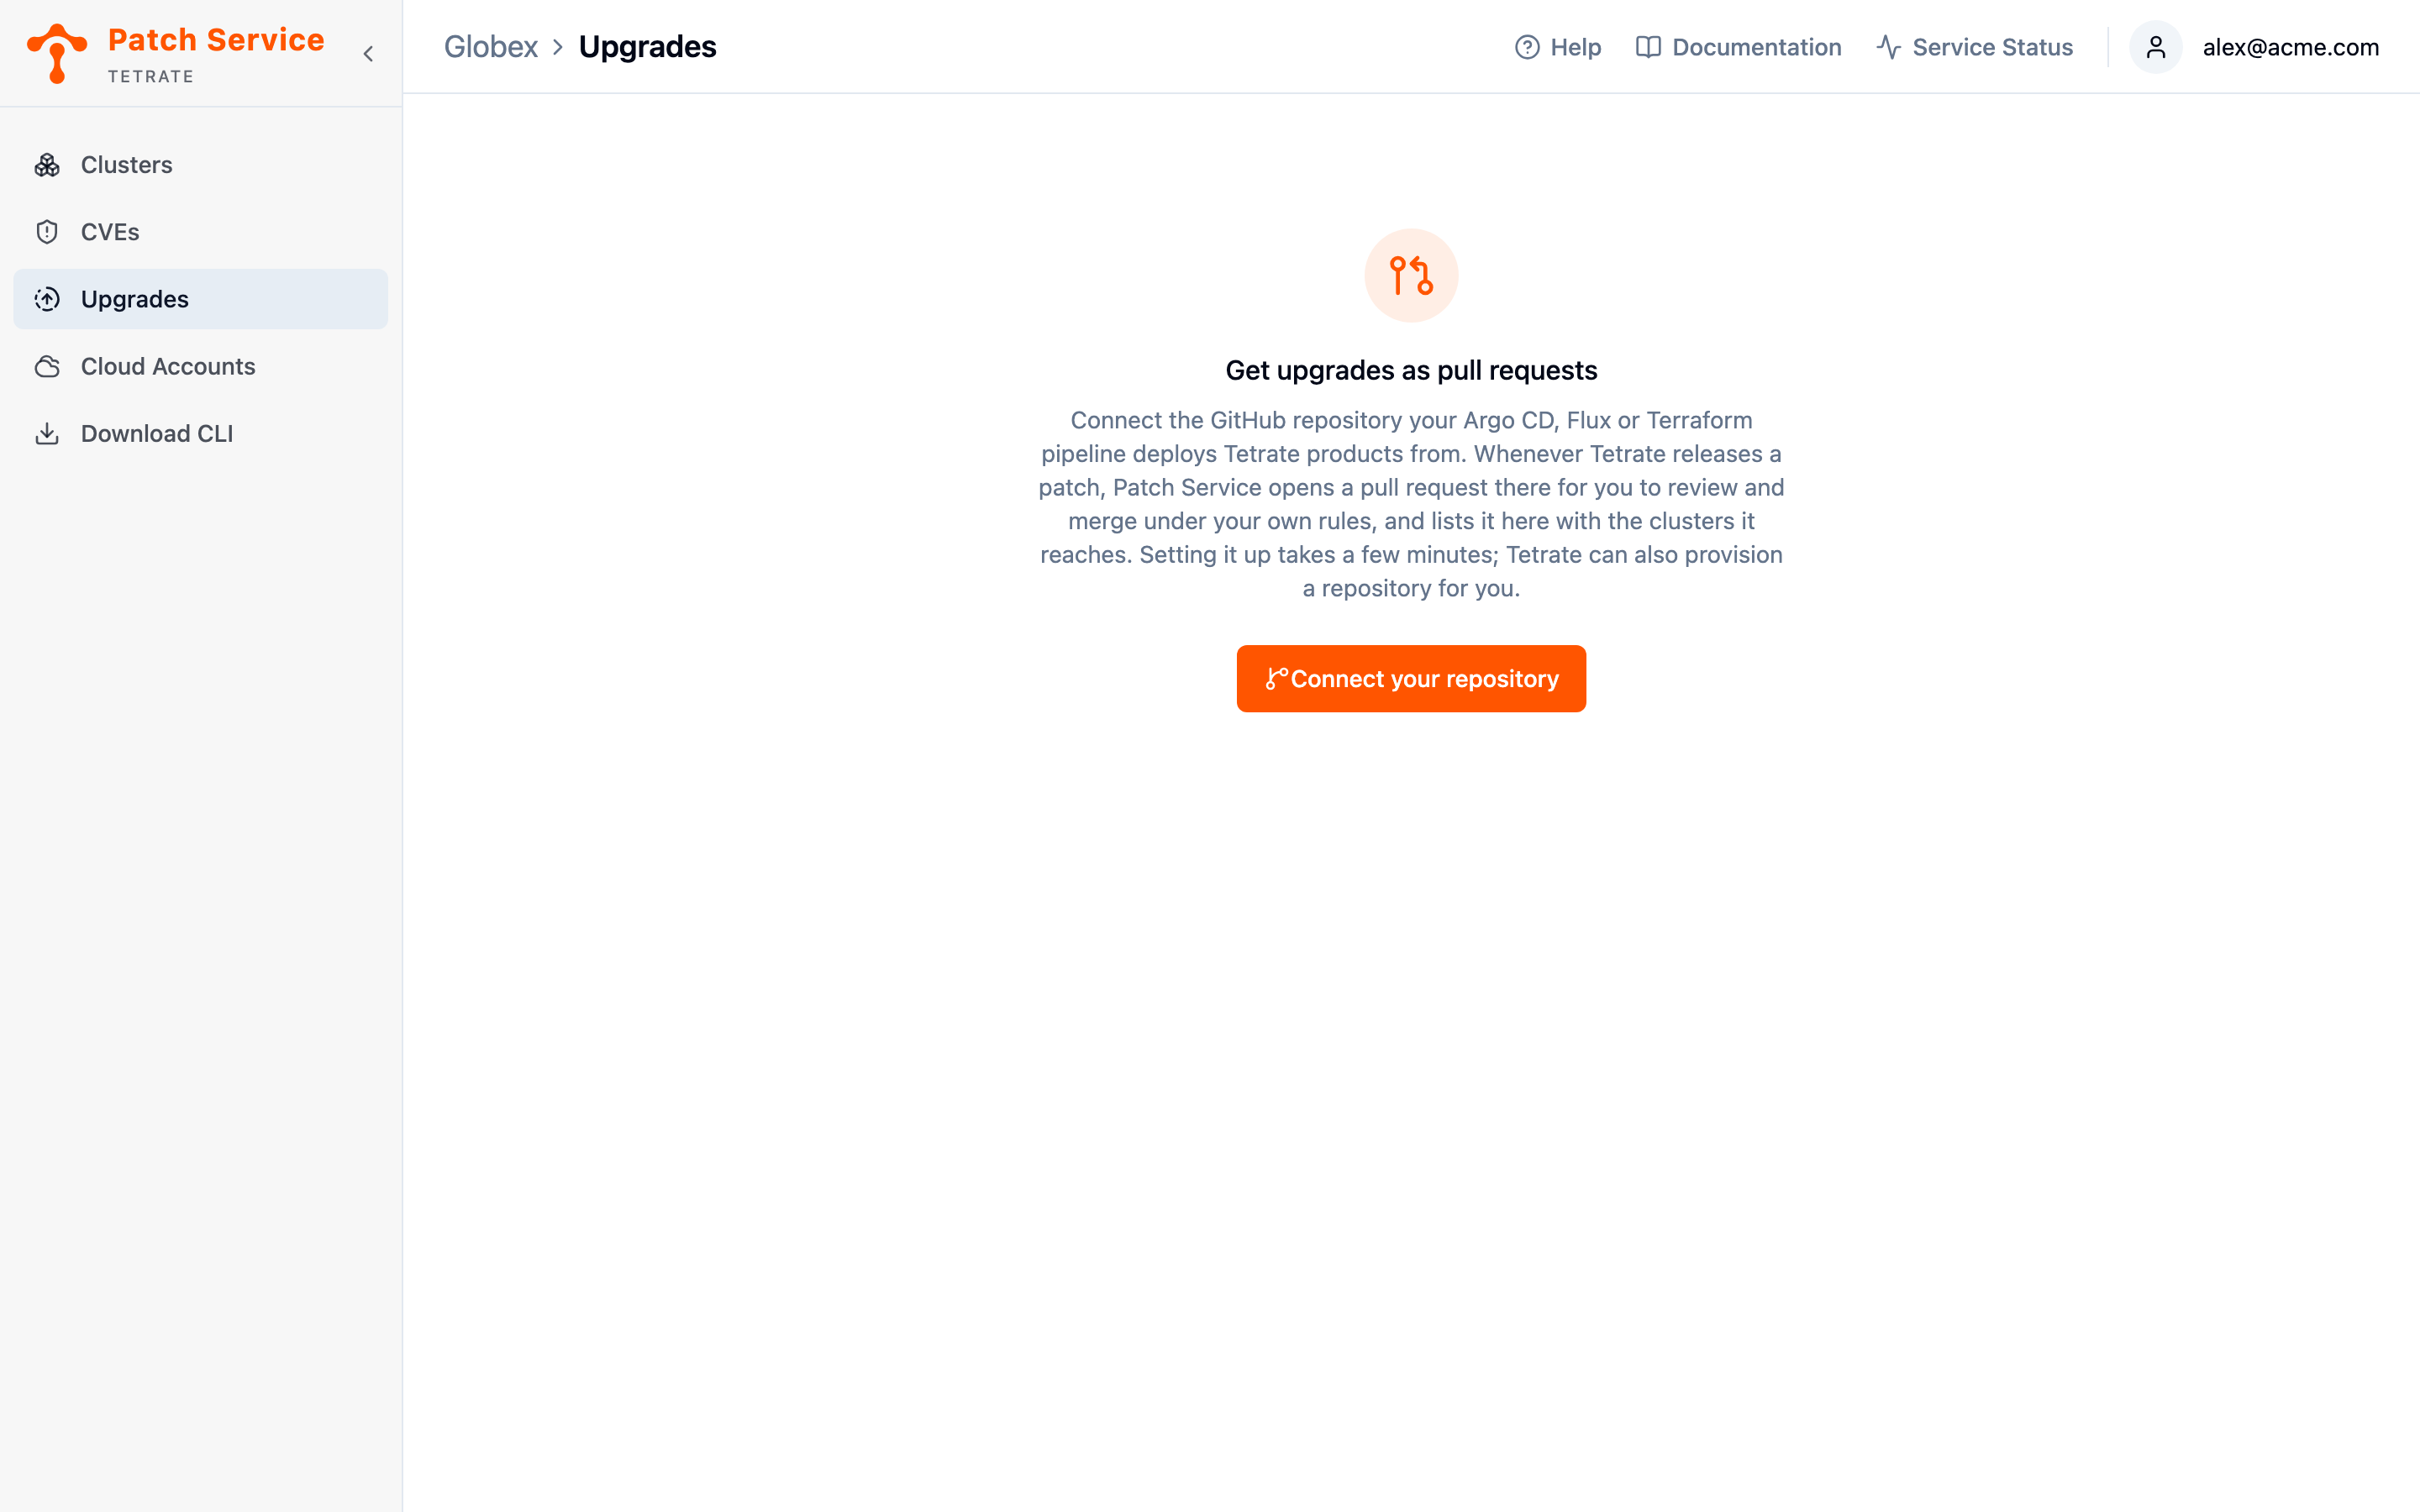
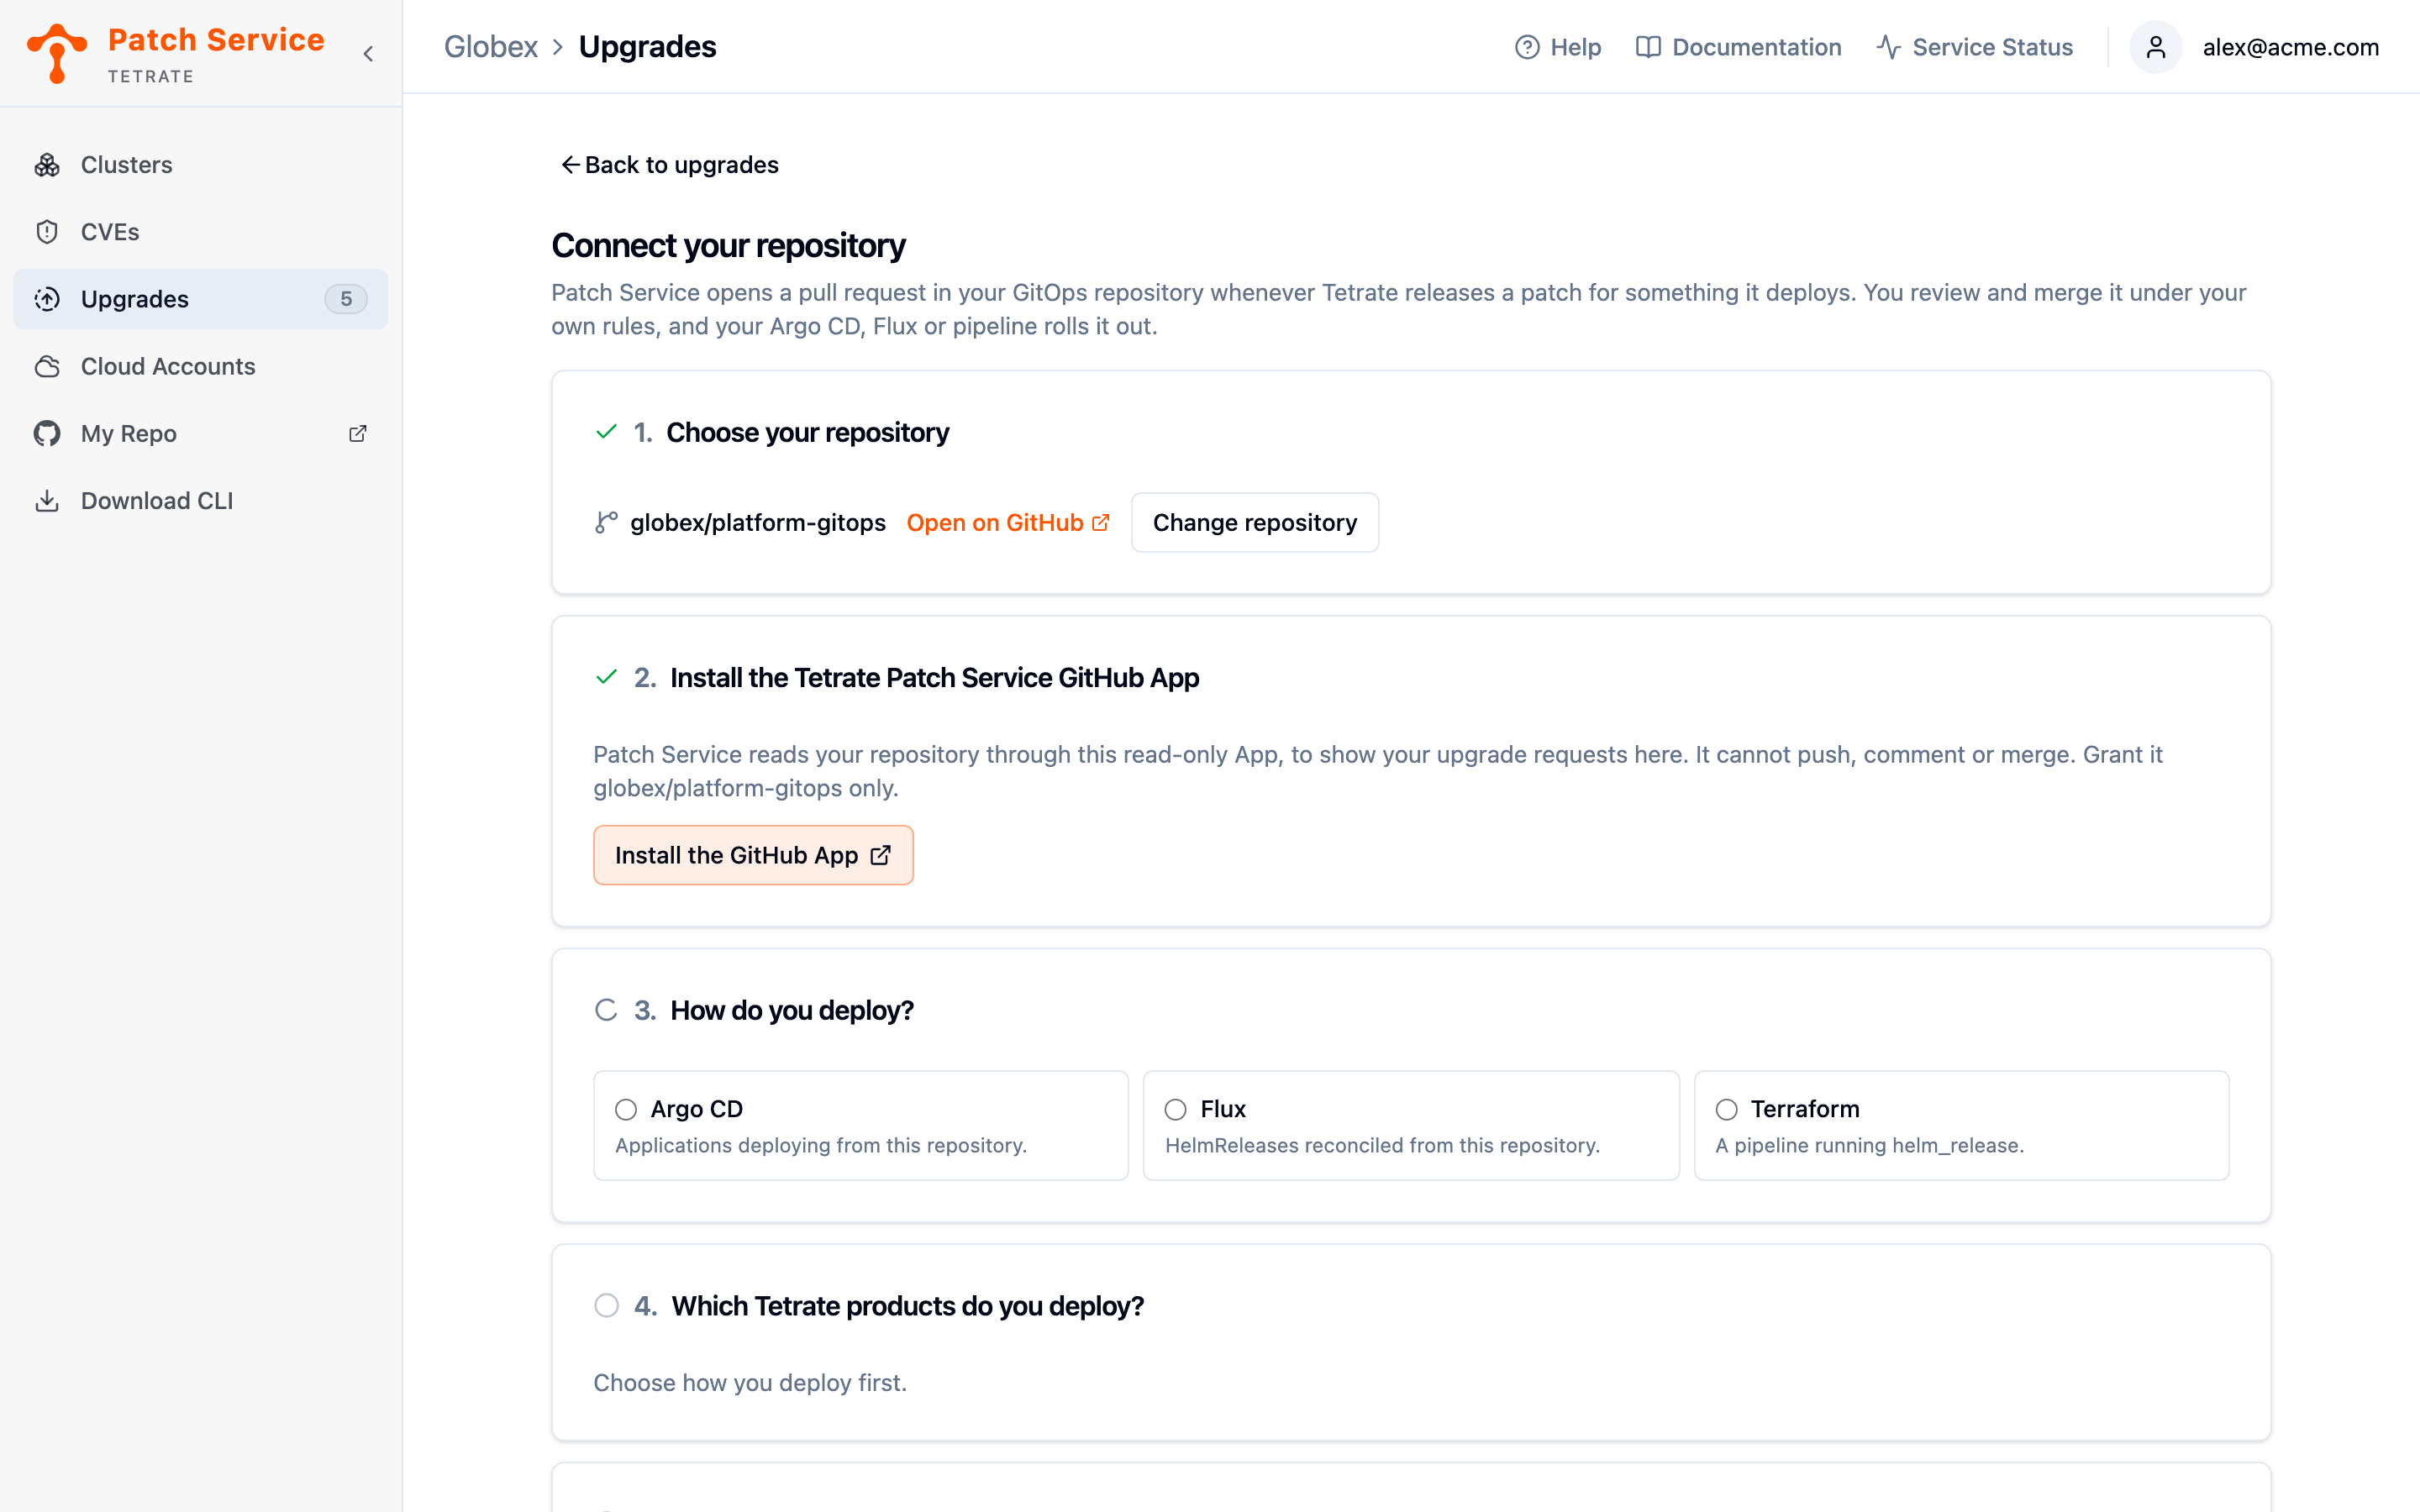
Click Connect your repository. The guide walks through six steps, and ticks each one off as Patch Service sees it done.
Step 2: Choose Your Repository
Enter the repository as owner/name, or paste its GitHub URL, and click Connect.
A repository can be connected to only one Patch Service account. If it is already connected to another, the console says so; contact Tetrate support if it is yours.
Step 3: Install the GitHub App
Click Install the GitHub App, and grant it the connected repository only. The App can read the repository, to show your upgrade requests in the console, and nothing else: it cannot push, comment or merge.
Step 4: Choose How You Deploy
Choose Argo CD, Flux or Terraform. The files and instructions in the next steps are for that tool.
Step 5: Choose Your Products
Tick the Tetrate products the repository deploys. The console offers the products your account has; contact Tetrate to add one. The agent is always included.
For Argo CD and Flux, you can also name the file that already deploys each product, such as clusters/prod/apps/teg.yaml. With it, upgrades move the chart version in that file as well as the images. Without it, upgrades move only the images.
Step 6: Add the Files to Your Repository
Click Download the files, and add them to your repository with the commands the guide shows:
git clone https://github.com/<owner>/<repository>.git
cd <repository>
unzip ~/Downloads/tetrate-<owner>-<repository>.zip
git add .tetrate .github/workflows/tetrate-upgrades.yaml
git commit -m "Receive Tetrate upgrades from Patch Service"
git push origin main
The download holds the manifest, a versions file for each product, the agent's files, and the upgrade workflow. Your Repository's Files explains each. Nothing secret is in it.
Then, in the repository's Settings → Actions → General, turn on Allow GitHub Actions to create and approve pull requests. Without it, the workflow cannot open its requests.
Once the commit is pushed, the guide confirms the repository is yours: its manifest names your account.
Step 7: Point Your Deploy Files at the Versions
The last step of the guide shows, for each product, the lines to add to the file that deploys it today. They do three things:
- Pass the product's versions file to its chart last, so the pinned images win over anything set earlier.
- Add two labels,
patch.tetrate.io/productandpatch.tetrate.io/environment, which tell the agent which product and environment it is looking at. - Upgrade the product's CRDs along with its chart.
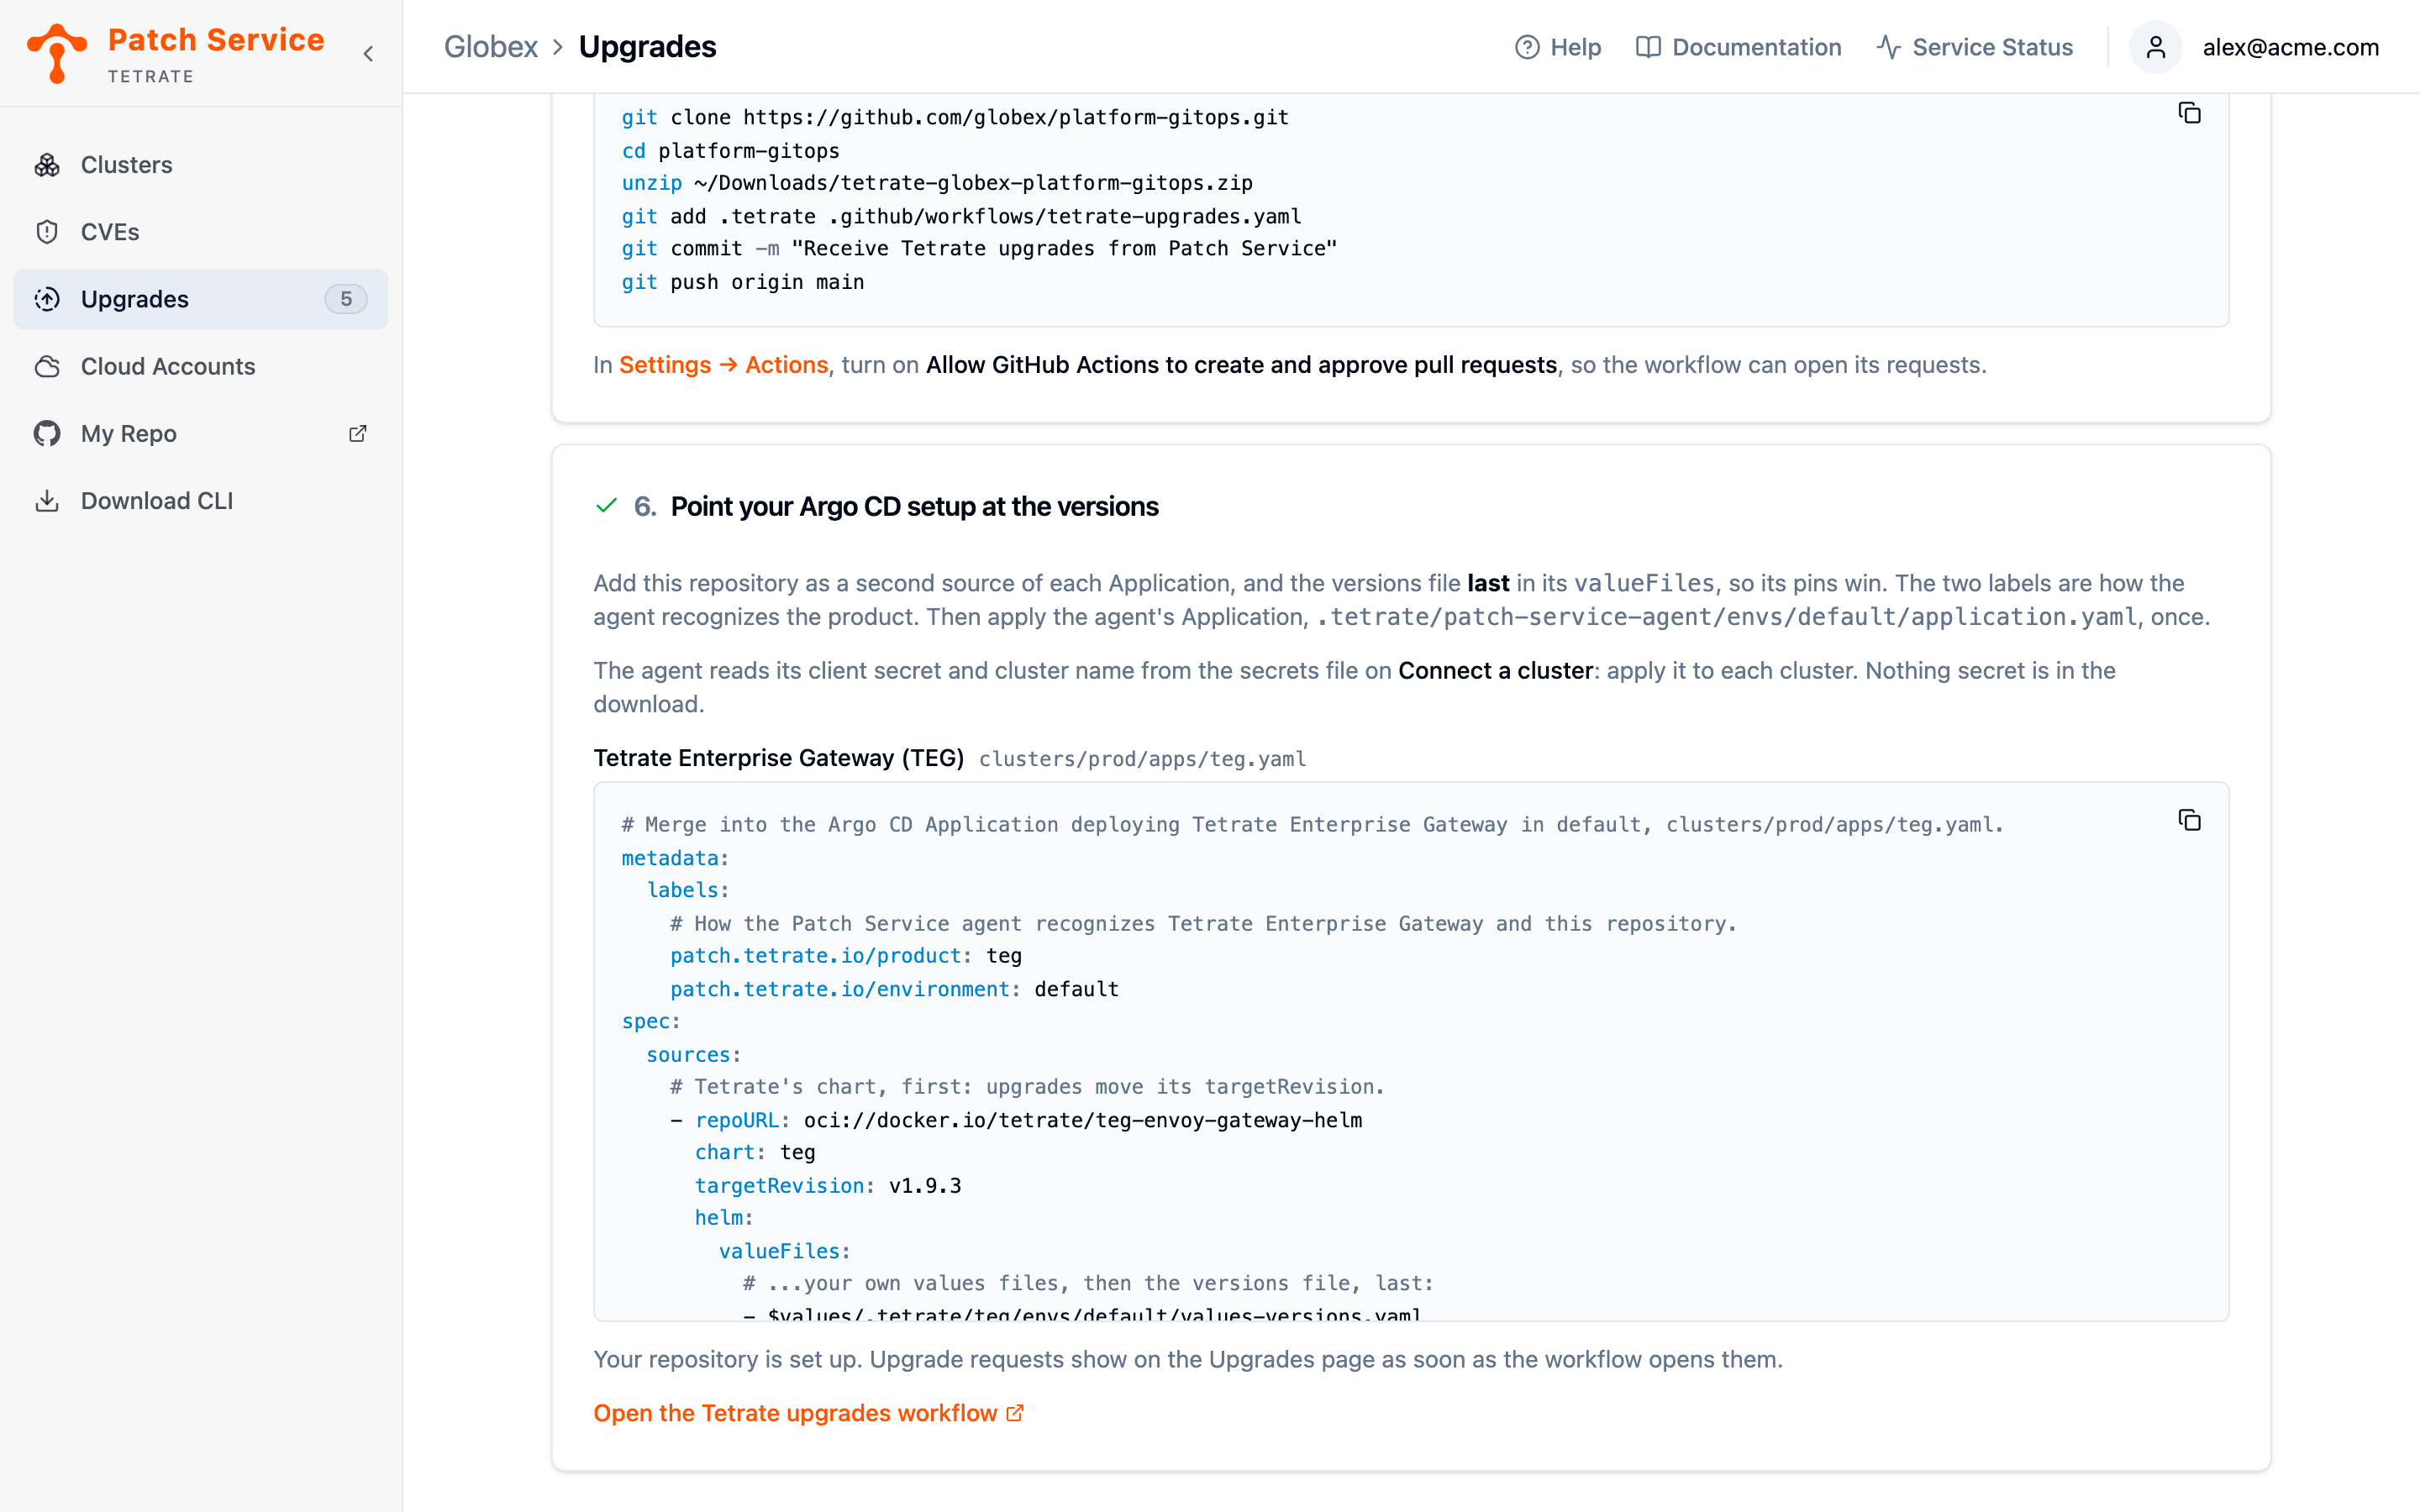
The details depend on the tool:
Step 8: Run the Workflow Once
In your repository's Actions tab, open Tetrate upgrades and click Run workflow. If anything is behind Tetrate's latest release, it opens a pull request for it; if nothing is, it opens none.
The Upgrades view now lists your products and any request waiting on them. Until every step is done, the view shows a Finish setting up checklist with what is left, and Continue setup takes you back to the guide.
Changing or Disconnecting the Repository
The bar at the top of the Upgrades view names the connected repository:
- Setup guide opens the guide again, for example to add a product.
- Change repository connects a different one.
- Disconnect stops upgrades. Requests already open stay open on GitHub, the workflow is refused from its next run, and your clusters show Manual upgrades until you connect a repository again.
Next Steps
- Receive and view upgrades to know what arrives and where it shows.
- Read Your Repository's Files to add environments or hold an upgrade back.