Installing the Management Plane
Before you install the Management Plane, verify that you have:
- Identified a target EKS cluster, and have configured eksctl and kubectl to access that cluster
- Obtained the installation tools
- Obtained access to the software images, either directly from Tetrate (option 1) or via AWS Marketplace (option 2)
Follow either Option 1 or Option 2 to install the Management Plane. Then proceed to access your Management Plane using tctl and a web browser.
- Option 1: Direct from Tetrate
- Option 2: AWS Marketplace
Installing from your Private Registry
Define the location of your private registry
Before you proceed, define the environment variable
HUBto identify your private registry:export HUB=<my-private-registry>Add the TSE repo
helm repo add tse https://charts.tse.tetrate.io/public/helm/charts
helm repo update
Install the Management Plane
This step typically takes 5-10 minutes to complete.
helm install tse-mp tse/managementplane \
  --version 1.8.0+tse \
  --namespace tse --create-namespace \
  --timeout 10m \
  --set image.registry=${HUB}
Installing from AWS Marketplace
Configure the Installation
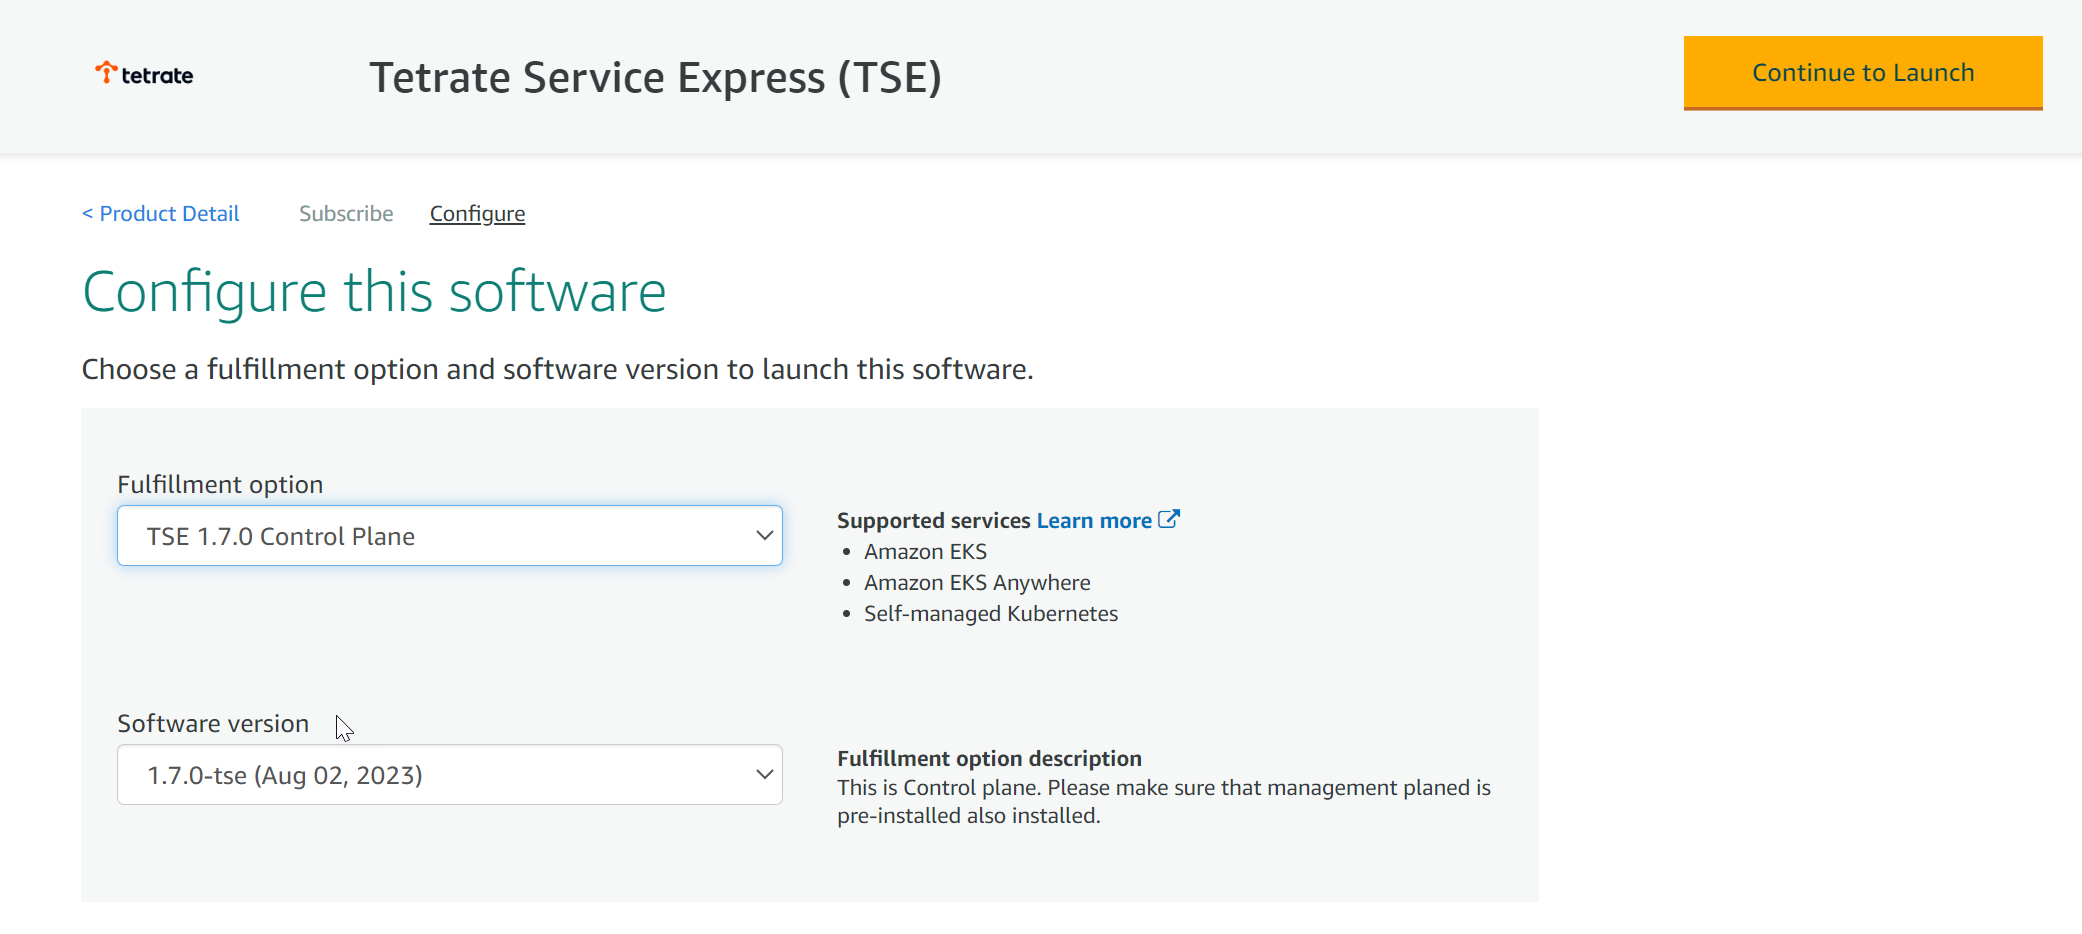
Locate your TSE Subscription in AWS Marketplace and chose to Configure the Software:
 Configure the TSE Software
Select TSE Management Plane, and the most recent software version available.
Click Continue to Launch.
Do not follow the marketplace instructions!For best results, use the following instructions.
Acquire the TSE repo charts
The TSE images are located in the AWS Marketplace
us-east-1region. You can install these images into any selected AWS region.Log in to the AWS ECR repository:
aws ecr get-login-password \
    --region us-east-1 | helm registry login \
    --username AWS \
    --password-stdin 709825985650.dkr.ecr.us-east-1.amazonaws.com
Prepare the file structure on your workstation and download the charts:
mkdir awsmp-chart && cd awsmp-chart

helm pull oci://709825985650.dkr.ecr.us-east-1.amazonaws.com/tetrate-io/tse/managementplane --version 1.8.0

tar xf $(pwd)/* && find $(pwd) -maxdepth 1 -type f -delete
Install the TSE Management Plane
This step typically takes 5-10 minutes to complete.
helm install tse-mp \
    --namespace tse managementplane/ \
    --create-namespace --timeout 20m \
    --set image.registry=709825985650.dkr.ecr.us-east-1.amazonaws.com/tetrate-io/tse \
    --set image.tag=1.8.0-tse
You can track progress by following the logs from the tsb-operator:
kubectl logs -f -n tse -l name=tsb-operator
Access the Management Plane with tctl and web browser
Configure tctl to access the new Management Plane
tctl is used to configure settings on the Management Plane. You need to obtain the external address for the envoy service that publishes the management plane, and provide tctl with the appropriate authentication settings:
ADDRESS=$(kubectl get svc -n "tse" envoy --output jsonpath='{.status.loadBalancer.ingress[0].hostname}')

kubectl get -n tse secret tsb-cert-issuer-ca -o jsonpath='{.data.ca\.crt}' | base64 -d > ~/.tctl/tse-root-ca.pem
tctl config clusters set tse --bridge-address $ADDRESS:443 --tls-custom-ca-file ~/.tctl/tse-root-ca.pem

tctl config users set tse --username tse --password "tse" --org "tse" --tenant "tse"
tctl config profiles set tse --cluster tse --username tse
tctl config profiles set-current tse

echo "\nManagement Plane URL:\nhttps://$ADDRESS/\n"
Access the Management Plane using a Web Browser
Log in at https://$ADDRESS, with username tse and password tse.
For convenience, you can run the following command on your local machine to open the Management Plane UI in your web browser: tctl ui
Tips and Troubleshooting
Use a pre-existing Cert-Manager install
When you install the Management Plane, the installation process checks to see if cert-manager is installed in the cluster. If it is present, TSE is configured to use the existing instance; otherwise, a new instance of cert-manager is installed and used by TSE. cert-manager is used to provision certificates for the mesh and internal TSE components.
You can also use an alternative CA, such as Amazon PCA, to issue per-cluster certificates, as described in the Amazon PCA Integration Guide.
Prepare cert-manager
TSE uses the kube-CSR API resource to provision certificates for various webhooks. You must ensure that your cert-manager can sign Kubernetes CSR requests.
For example, in cert-manager 1.12.2, this is enabled by setting this feature gate flag:
ExperimentalCertificateSigningRequestControllers=true
You can apply this feature gate flag at install time:
helm repo add jetstack https://charts.jetstack.io
helm repo update
helm install cert-manager jetstack/cert-manager --namespace cert-manager --create-namespace \
    --set featureGates="ExperimentalCertificateSigningRequestControllers=true" \
    --set installCRDs=true