 Tetrate Istio SubscriptionVersion: Next
Install TIS Agent
This page describes how to install the TIS Dashboard Agent component. The Agent component is deployed in each individual Istio cluster and is responsible for gathering data from its respective cluster and transmitting it to the Central component. This ensures comprehensive data collection and facilitates real-time monitoring and management across all clusters.
Before you begin
Please ensure you have the following prerequisites:
- A Kubernetes cluster with Istio installed and the
kubectlconfigured to communicate with your cluster. TIS Agent is compatible with any Istio distribution including upstream Istio and Tetrate Istio. helmtool (version 3.6 or later).- Credentials from Tetrate to access Tetrate's private repository. Set your credential as env variable:
export TIS_USER="<tis-username>"
export TIS_PASS="<tis-password>" - Allow connection to
tis.tetrate.io:443in your firewall settings. The TIS Agents communicate with the Tetrate CVE backend to send SHA digests of the images in the cluster and receive CVE information. If your TIS Agents have Istio sidecars and Istio is inREGISTRY_ONLYmode, you will need to allowlist thus:apiVersion: networking.istio.io/v1beta1
kind: ServiceEntry
metadata:
name: cve-server
spec:
hosts:
- tis.tetrate.io
ports:
- number: 443
name: https
protocol: HTTPS
resolution: DNS
location: MESH_EXTERNAL
TIS Agent Installation Steps
Open TIS Dashboard UI
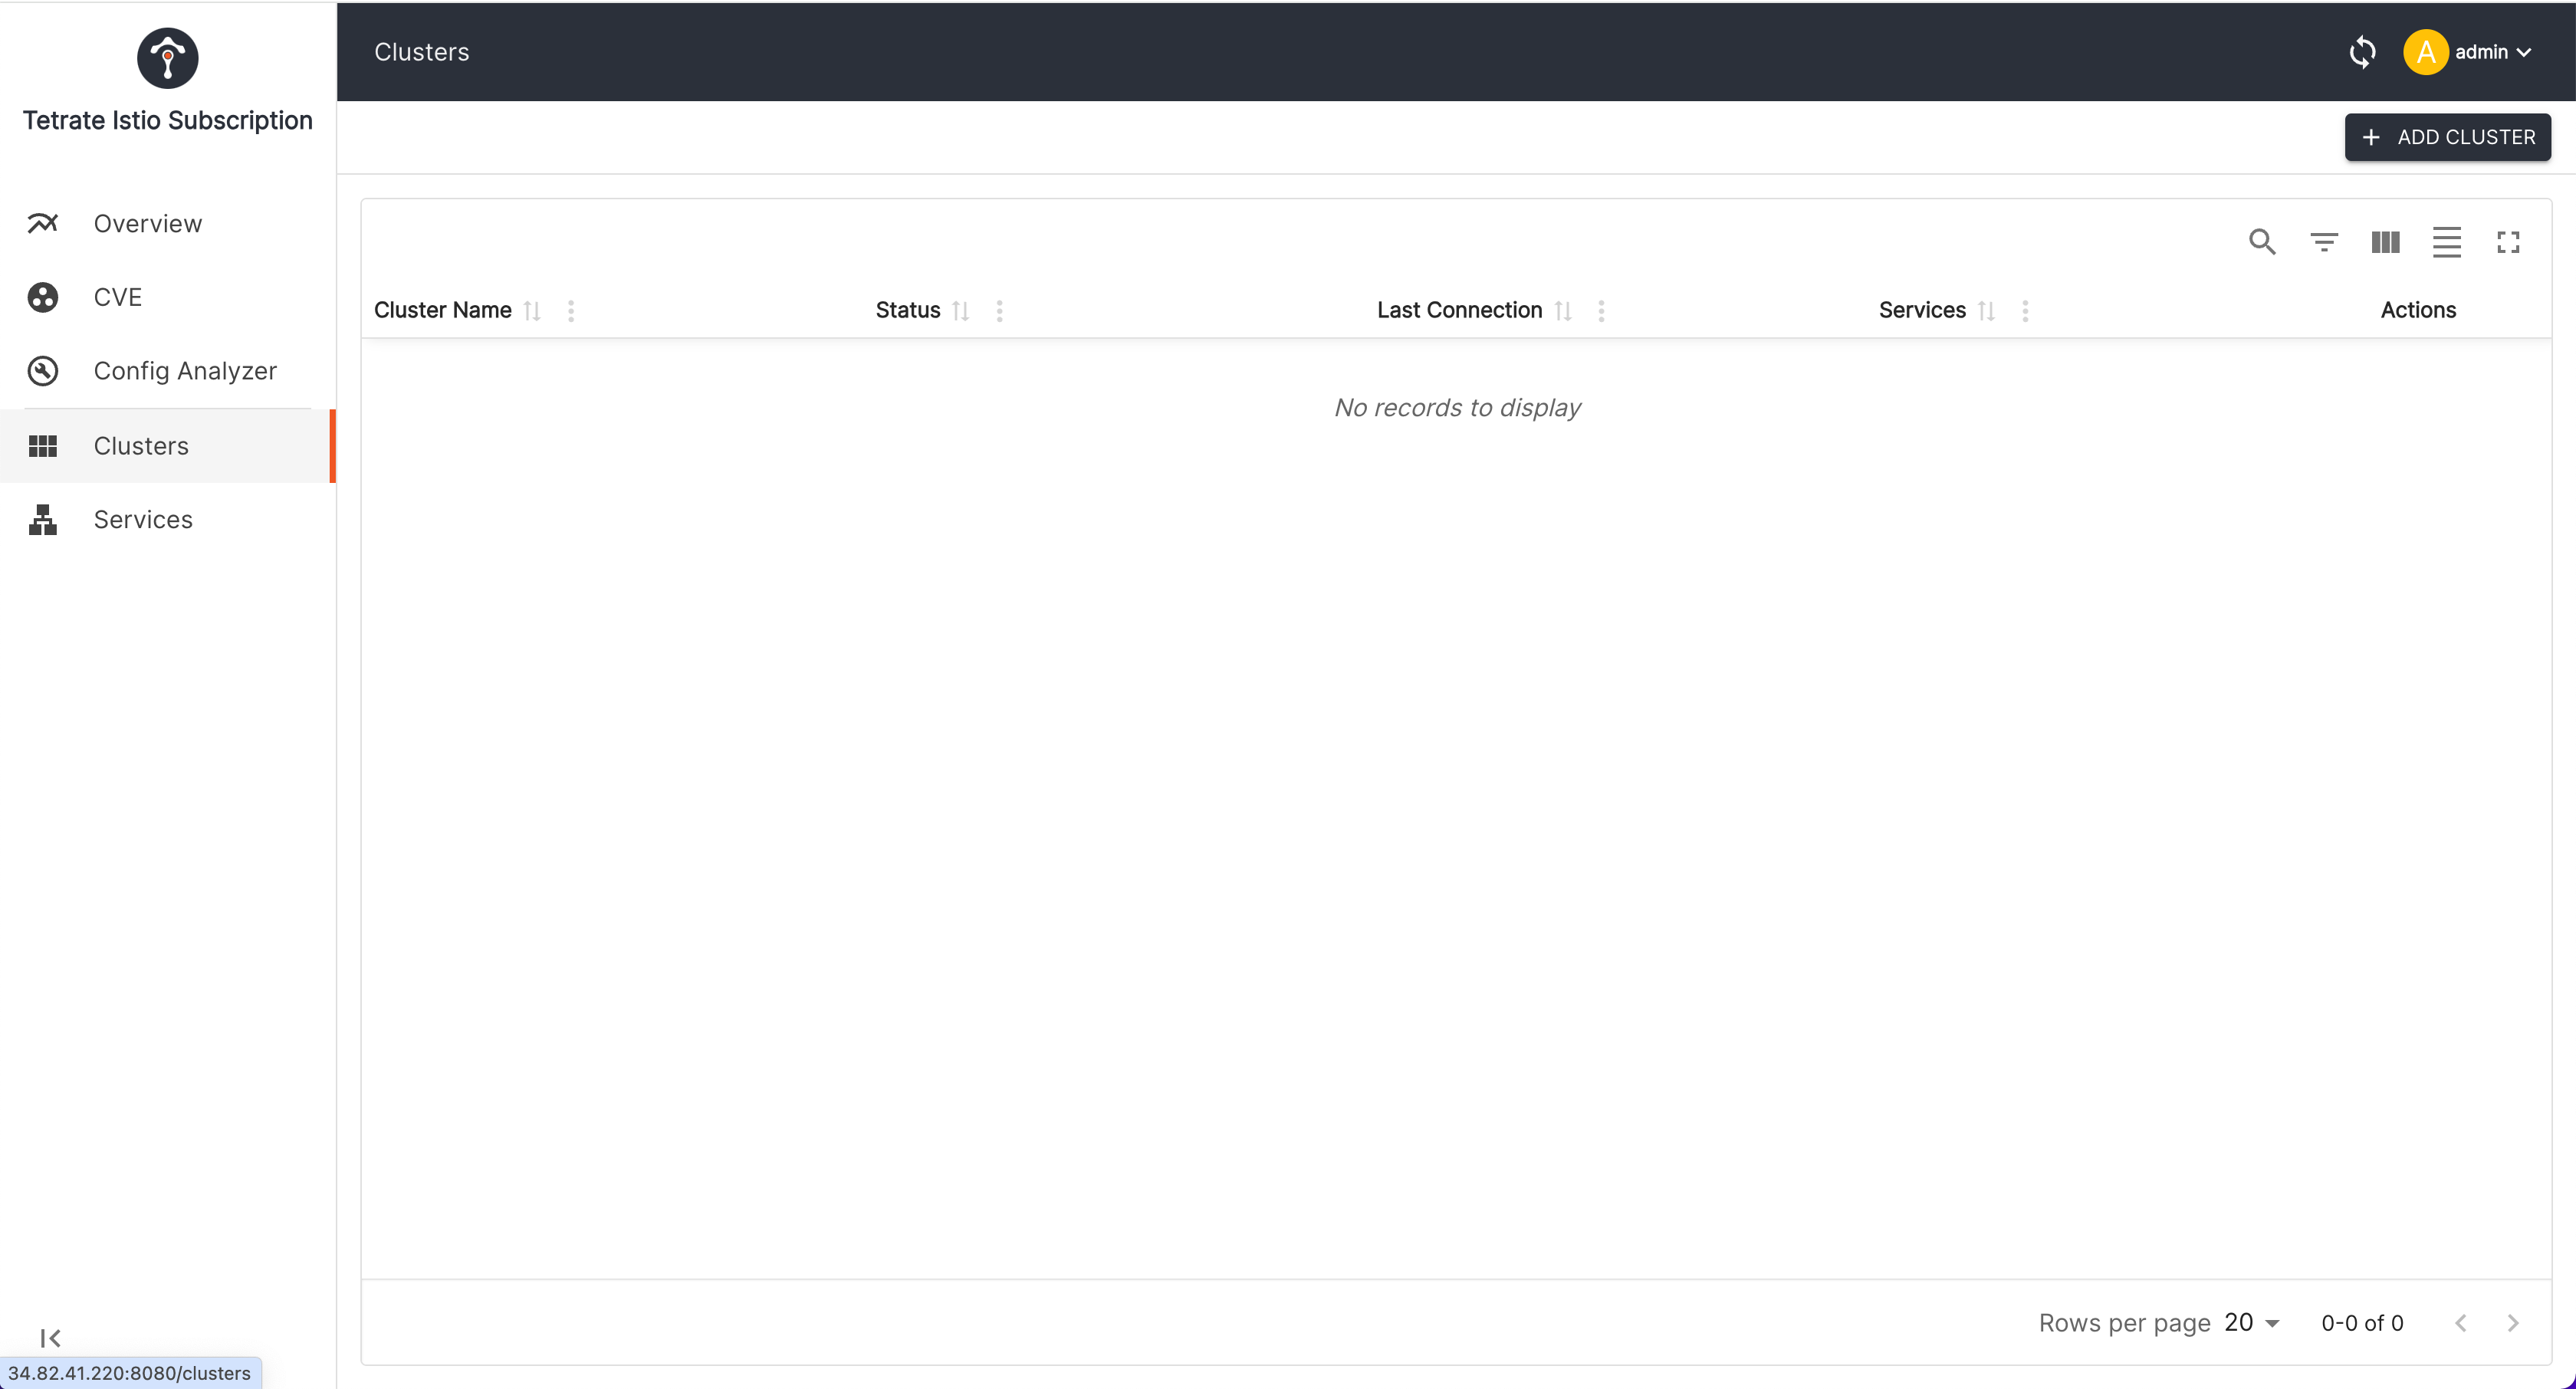
Open the TIS Dashboard UI and navigate to the Clusters tab. You can find the Clusters tab in the left navigation menu. Since you haven't added any clusters yet, Add cluster button will also be available in Overview page.
 Cluster list
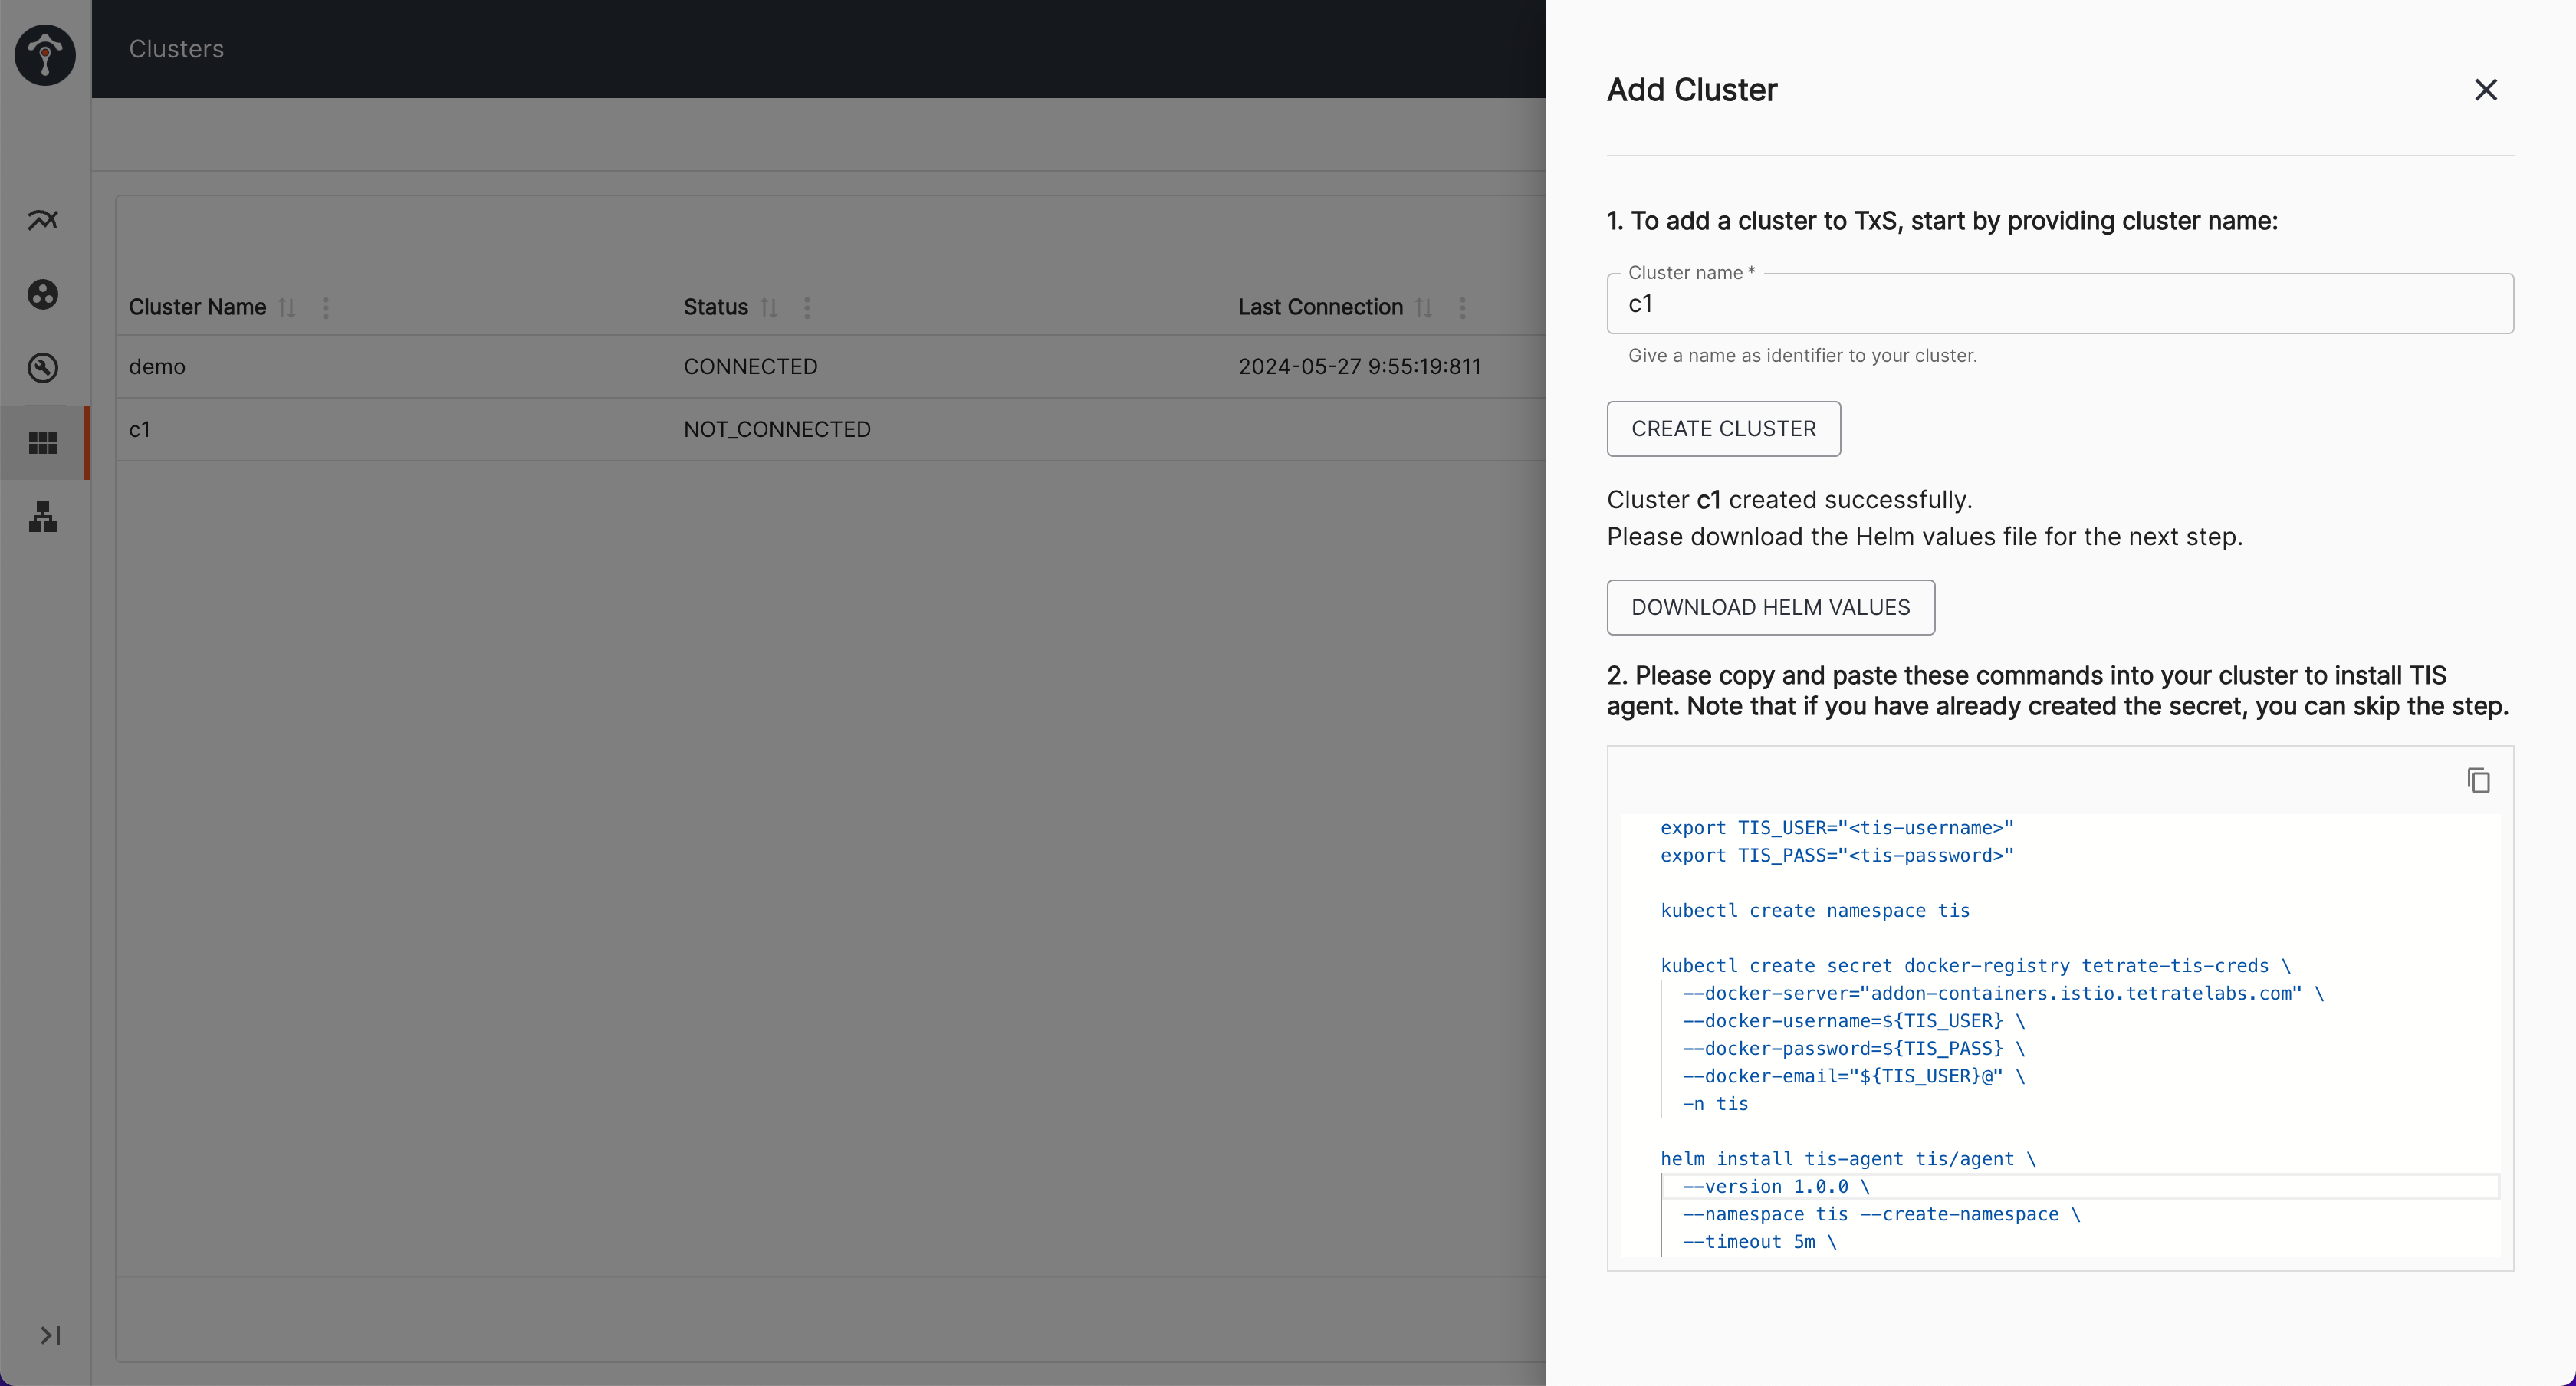
Add new cluster
Click on the Add Cluster button to add a new cluster. You will see a form where you can enter the cluster name. After entering the cluster name, click on the Create Cluster button. It will generate a Helm values file that you can use to install the TIS Agent and Helm command to install the TIS Agent.
Downloading Helm valuesIf you did not download the Helm values file and proceed with installing agent, the cluster status will be
NOT_CONNECTED. If you want to use same cluster name, you must delete the cluster and add it again to download the Helm values file. Download Helm values and instruction to install TIS Agent on Istio cluster
Create image pull secret
Create a new namespace and an image secret with your credentials. Note that if you have already created the secret, you can skip this step.
kubectl create namespace tis

kubectl create secret docker-registry tetrate-tis-creds \
    --docker-server="addon-containers.istio.tetratelabs.com" \
    --docker-username=${TIS_USER} \
    --docker-password=${TIS_PASS} \
    --docker-email="${USER}@" \
    -n tis
Install TIS Agent
Customizing InstallationYou can get the list of all available configuration options by running
helm show values tis/agent.VersionWhen using TIS Dashboard UI to install the TIS Agent, the Helm version is automatically set to the latest version. If you want to install a specific version, you can set the version in the Helm command.
Download the Helm values file to a local directory and install the TIS Agent using the command provided in the TIS Dashboard UI.
helm install tis-agent tis/agent \
  --version 1.0.0 \
  --namespace tis --create-namespace \
  --timeout 5m \
  --set 'image.pullSecrets[0].name=tetrate-tis-creds' \
  --values c1-values.yaml
helm ls -n tis
kubectl get pods -n tis
Upgrade TIS Agent
To upgrade the TIS Dashboard Agent component, you can use the following command:
helm upgrade agent tis-agent/agent -n tis --version ${VERSION}
Uninstall TIS Agent
To uninstall the TIS Dashboard agent component, you can use the following command:
helm uninstall tis-agent -n tis